This mini pie crust recipe is perfect for a single serving pie. The ingredients are simple and the process to make it is quick and easy.
Want to save this post?
Enter your email below and get it sent straight to your inbox. Plus, I'll send you the latest recipes and tips every week!
This scaled down recipe is perfect for when you want a single serving of pie. It's quick, easy, and only requires four ingredients plus ice cold water.
It can also be made in advance and frozen for later. So, whether you're in the mood for a fruit pie or a chocolate one, this recipe will come in handy.
Not only is this recipe is quick and easy to follow, it yields a delicious and flaky crust. It is sure to make your mini pie irresistible.
Jump to:
Ingredients
You just need a few simple ingredients to make this mini pie crust. In fact, you probably already have everything you need in your kitchen.
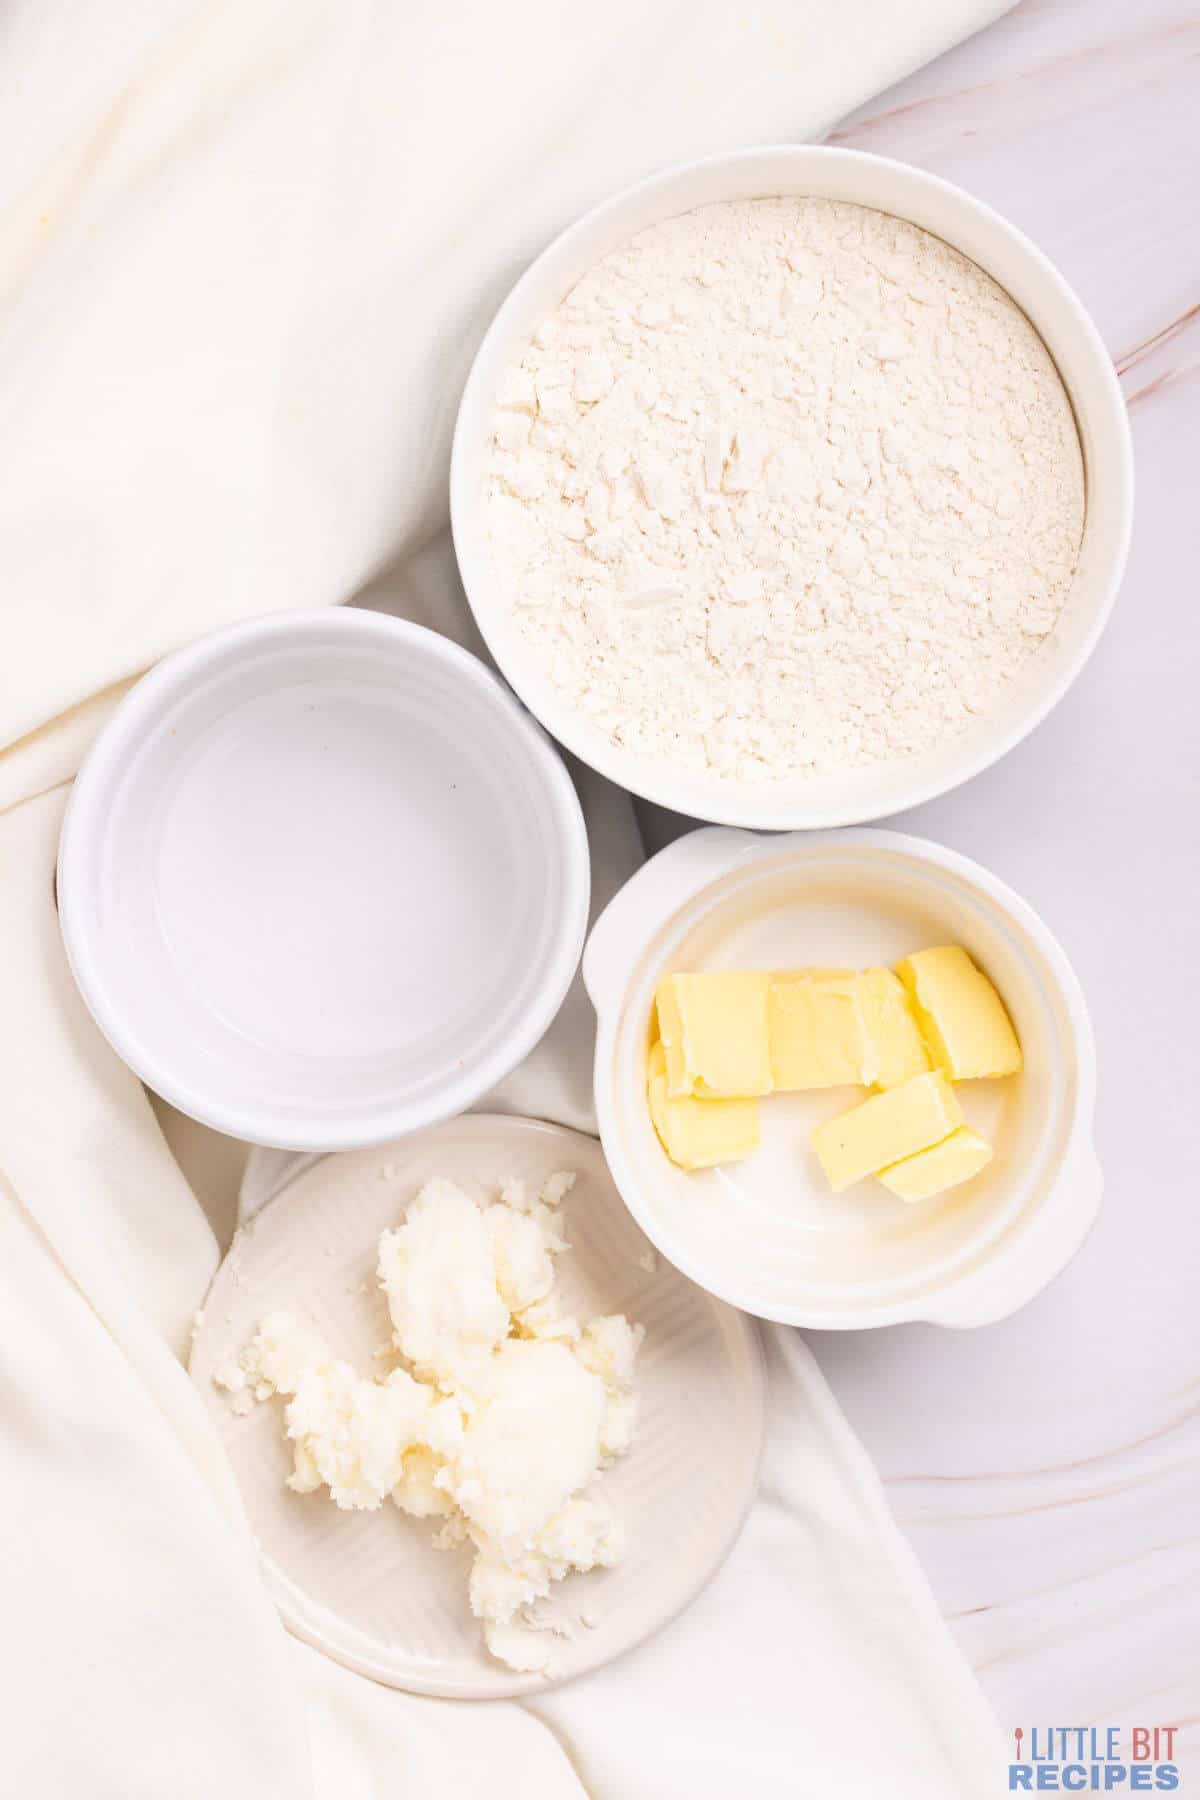
You need these ingredients on hand.
- Flour
- Butter
- Shortening
- Salt
- Ice water
See recipe card for quantities.
Instructions
The process for making this scaled down mini pie crust is the same as what you'd do for a traditional recipe. You'll just need to form the dough, roll it out, form the crust, then bake.
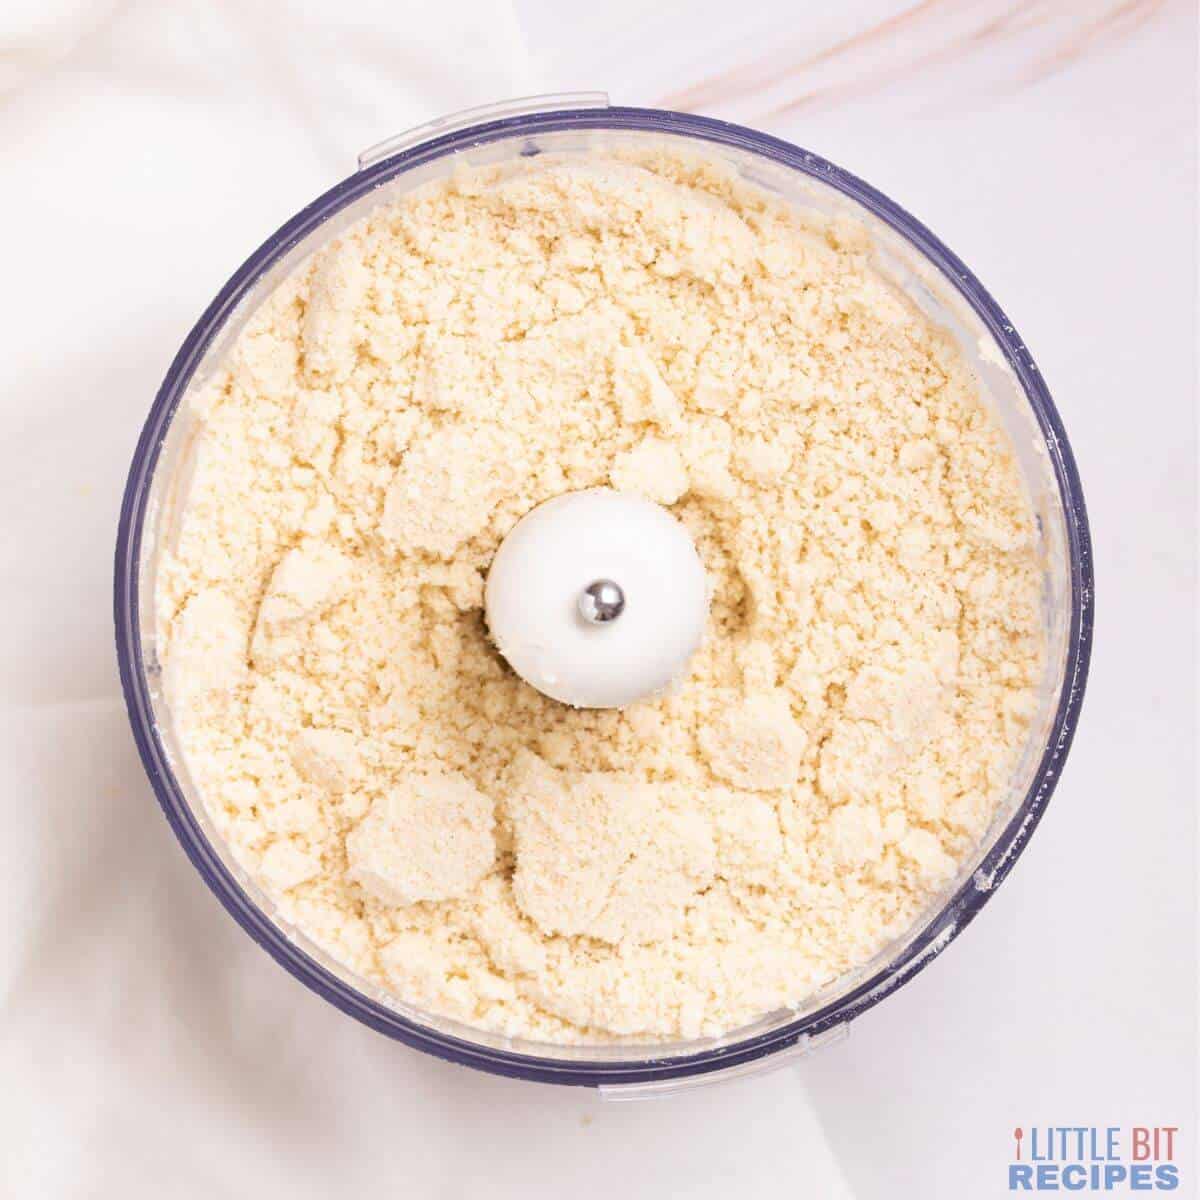
Add the flour and salt to a small food processor then pulse to combine.
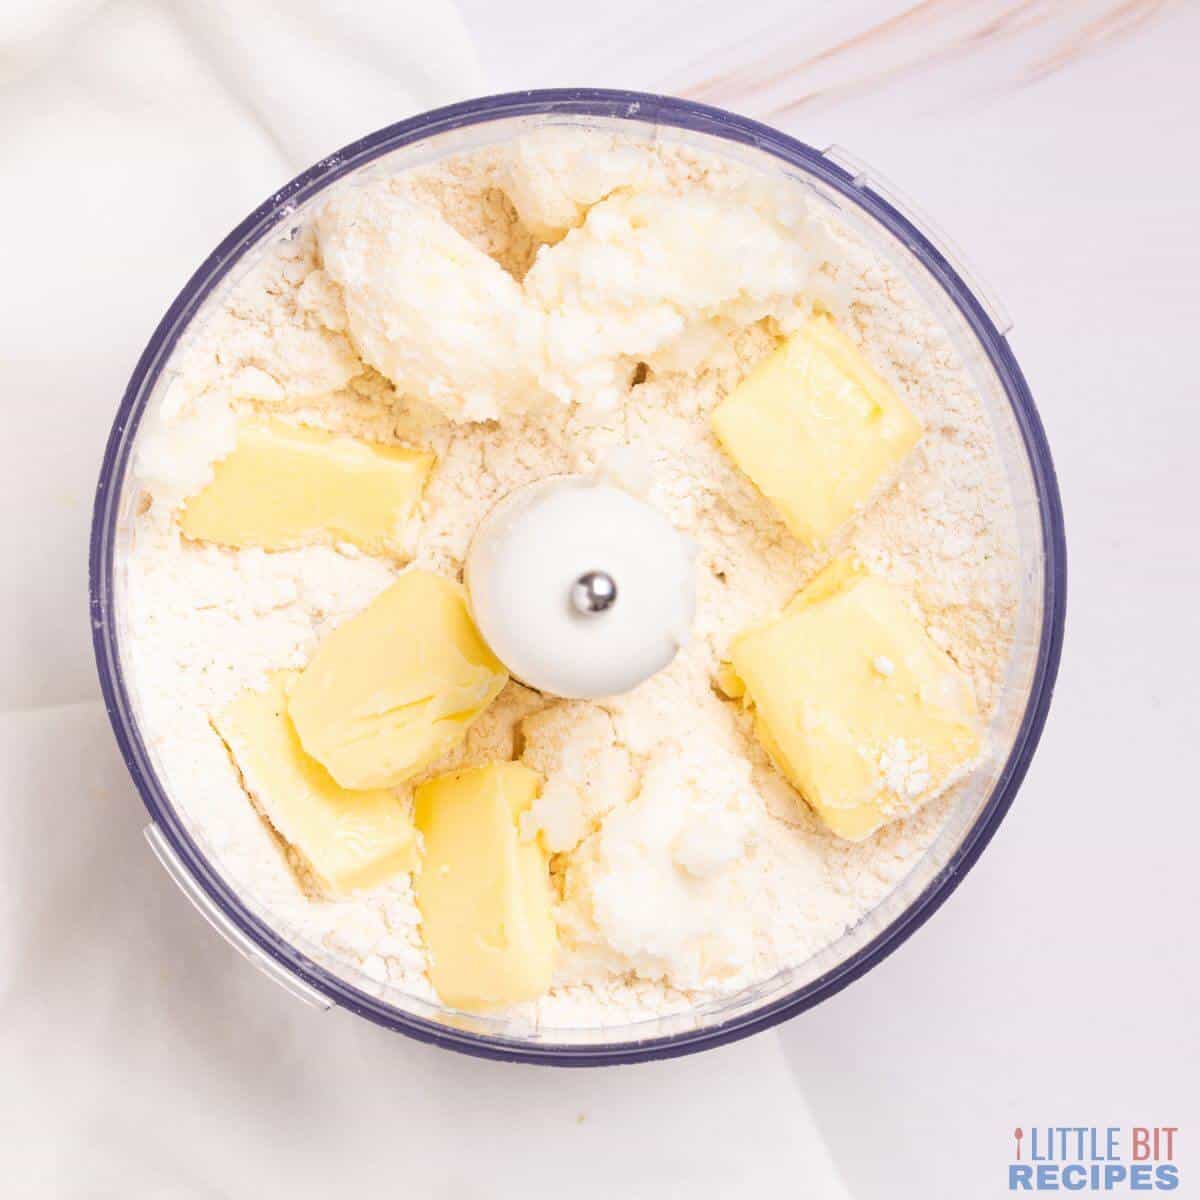
Add cold butter and shortening to the mixture. Pulse until a coarse sand texture is reached.
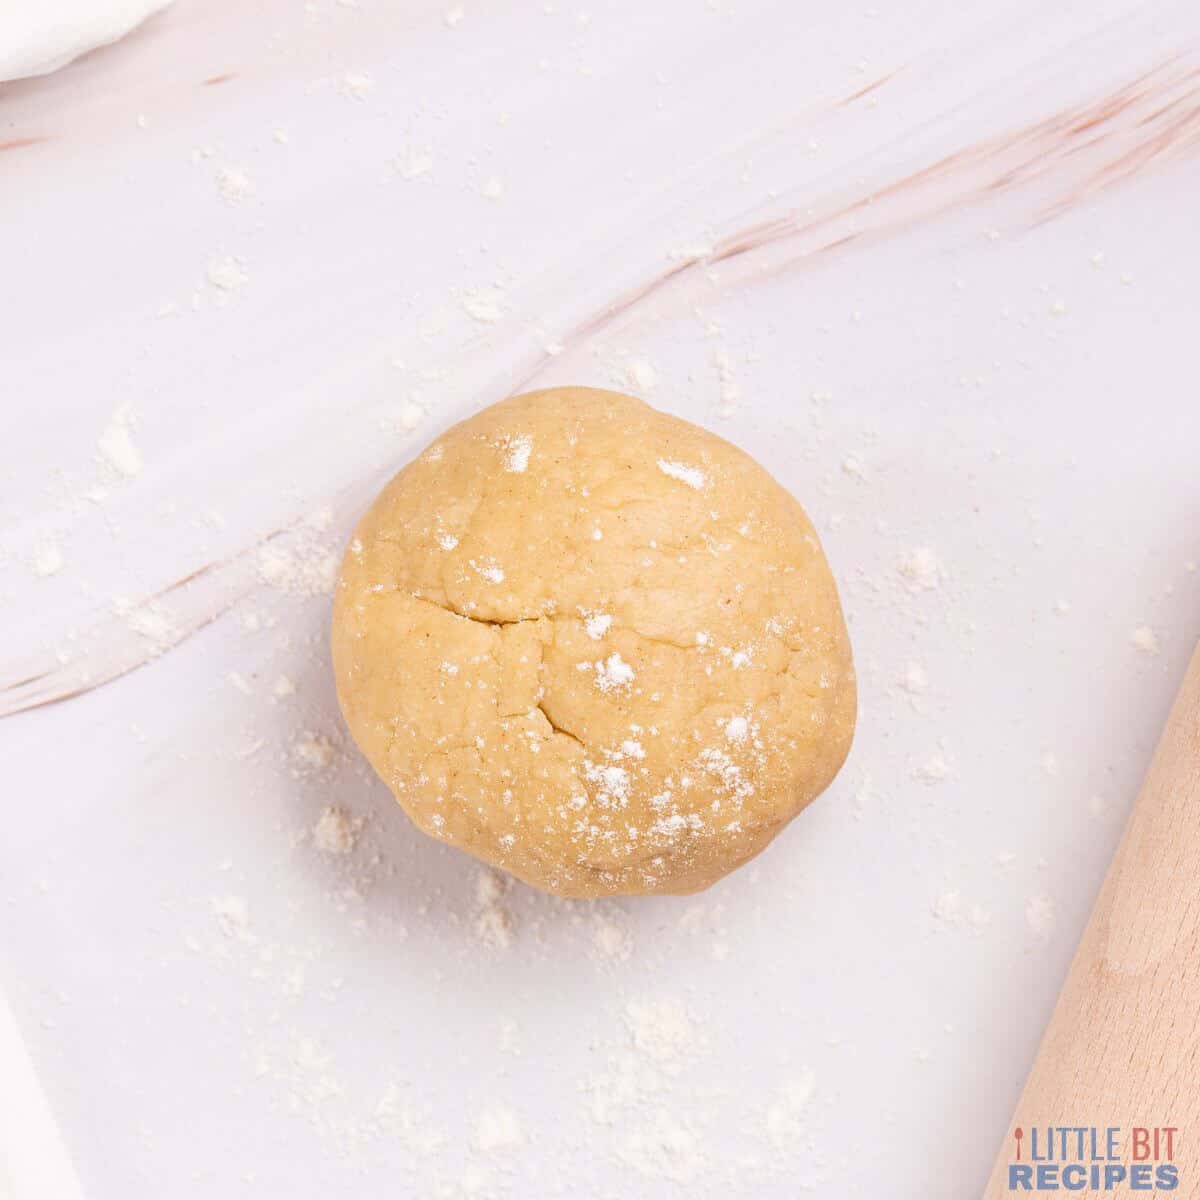
Continue pulsing and pour cold water, one tablespoon at a time until the dough comes together into a ball. Transfer the dough to a lightly floured surface
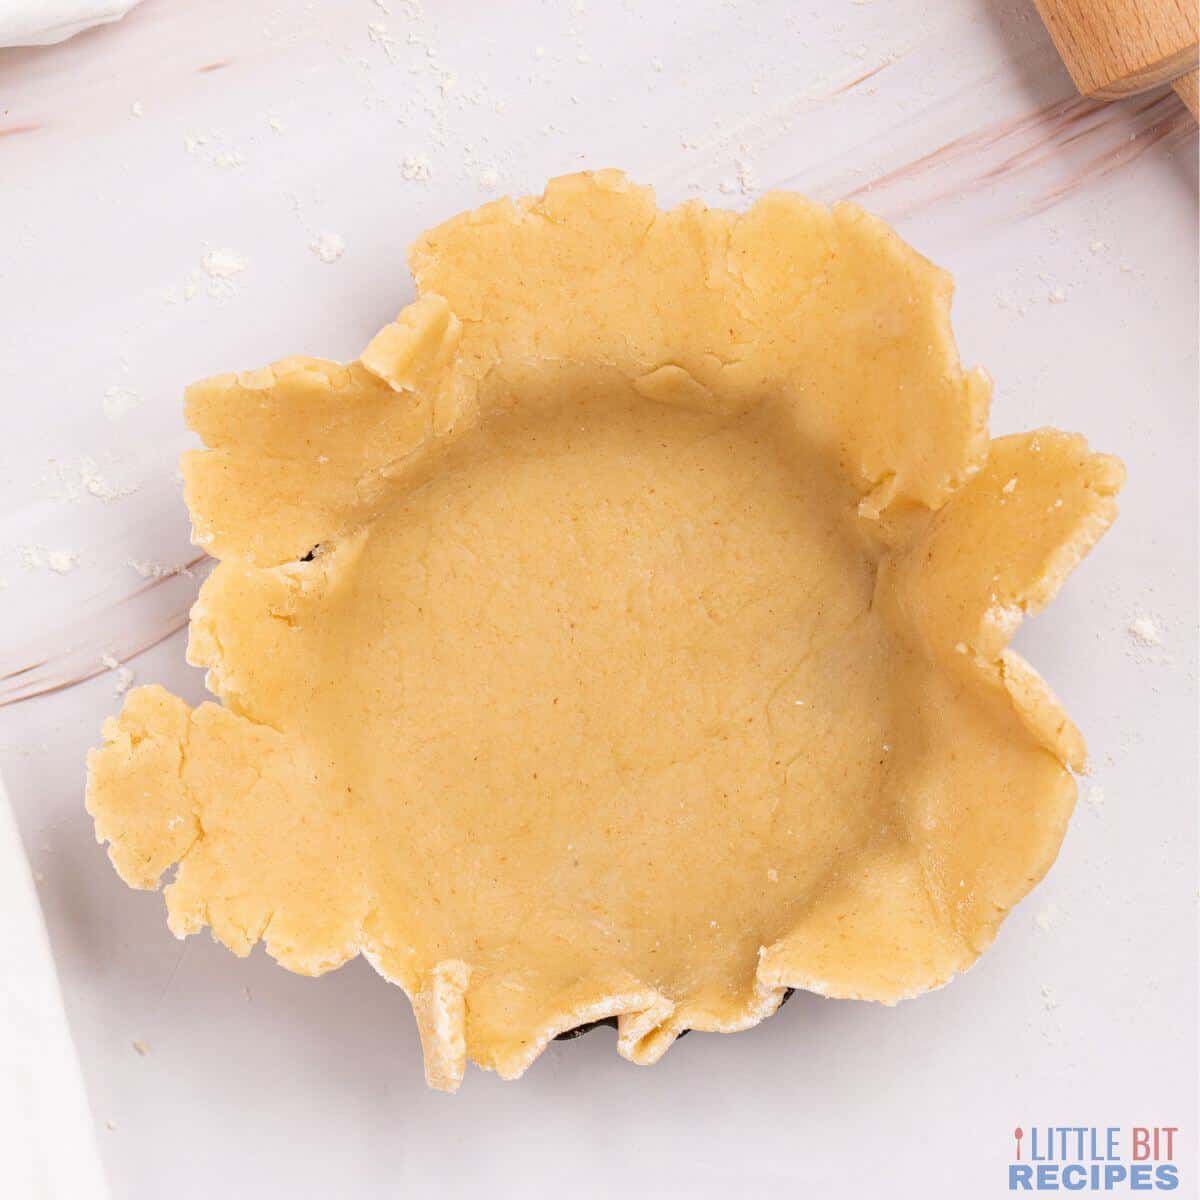
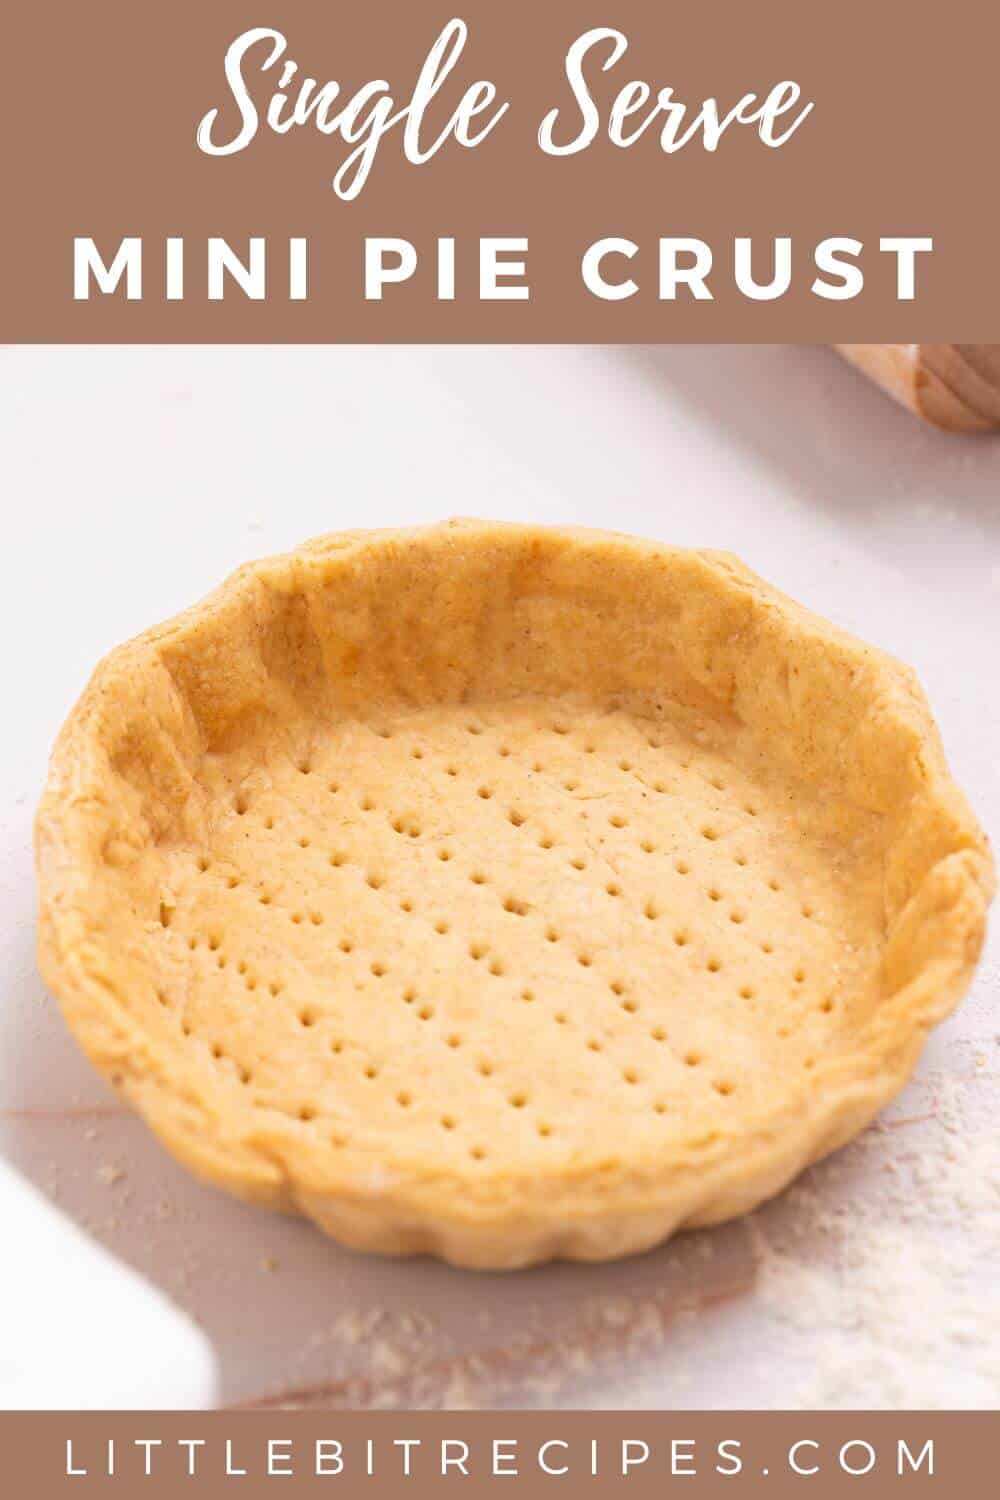
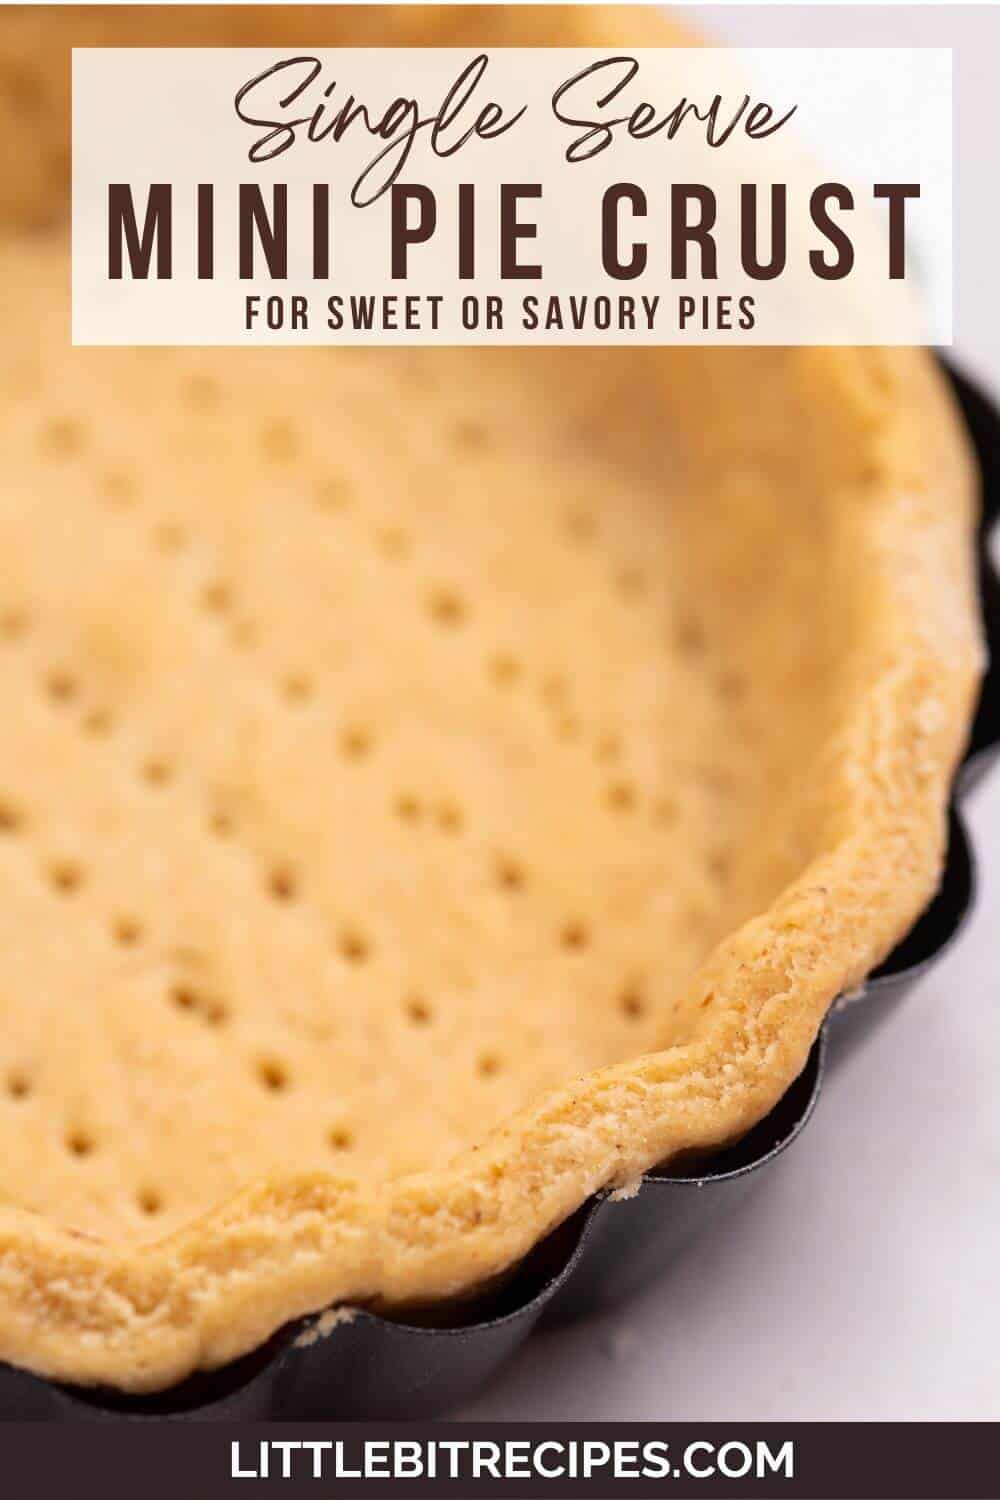
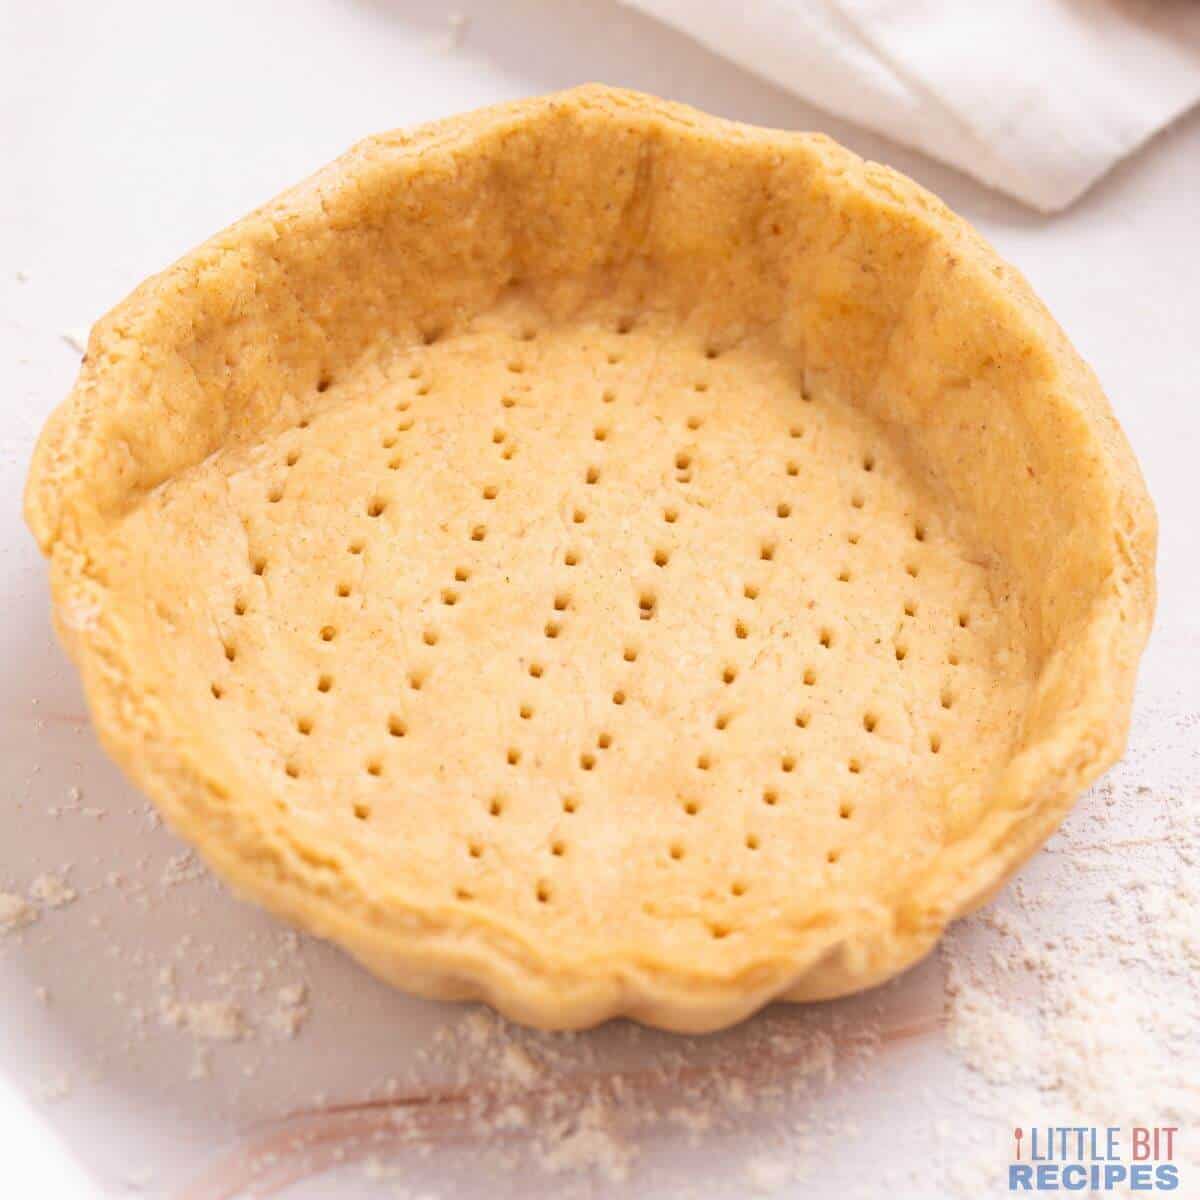
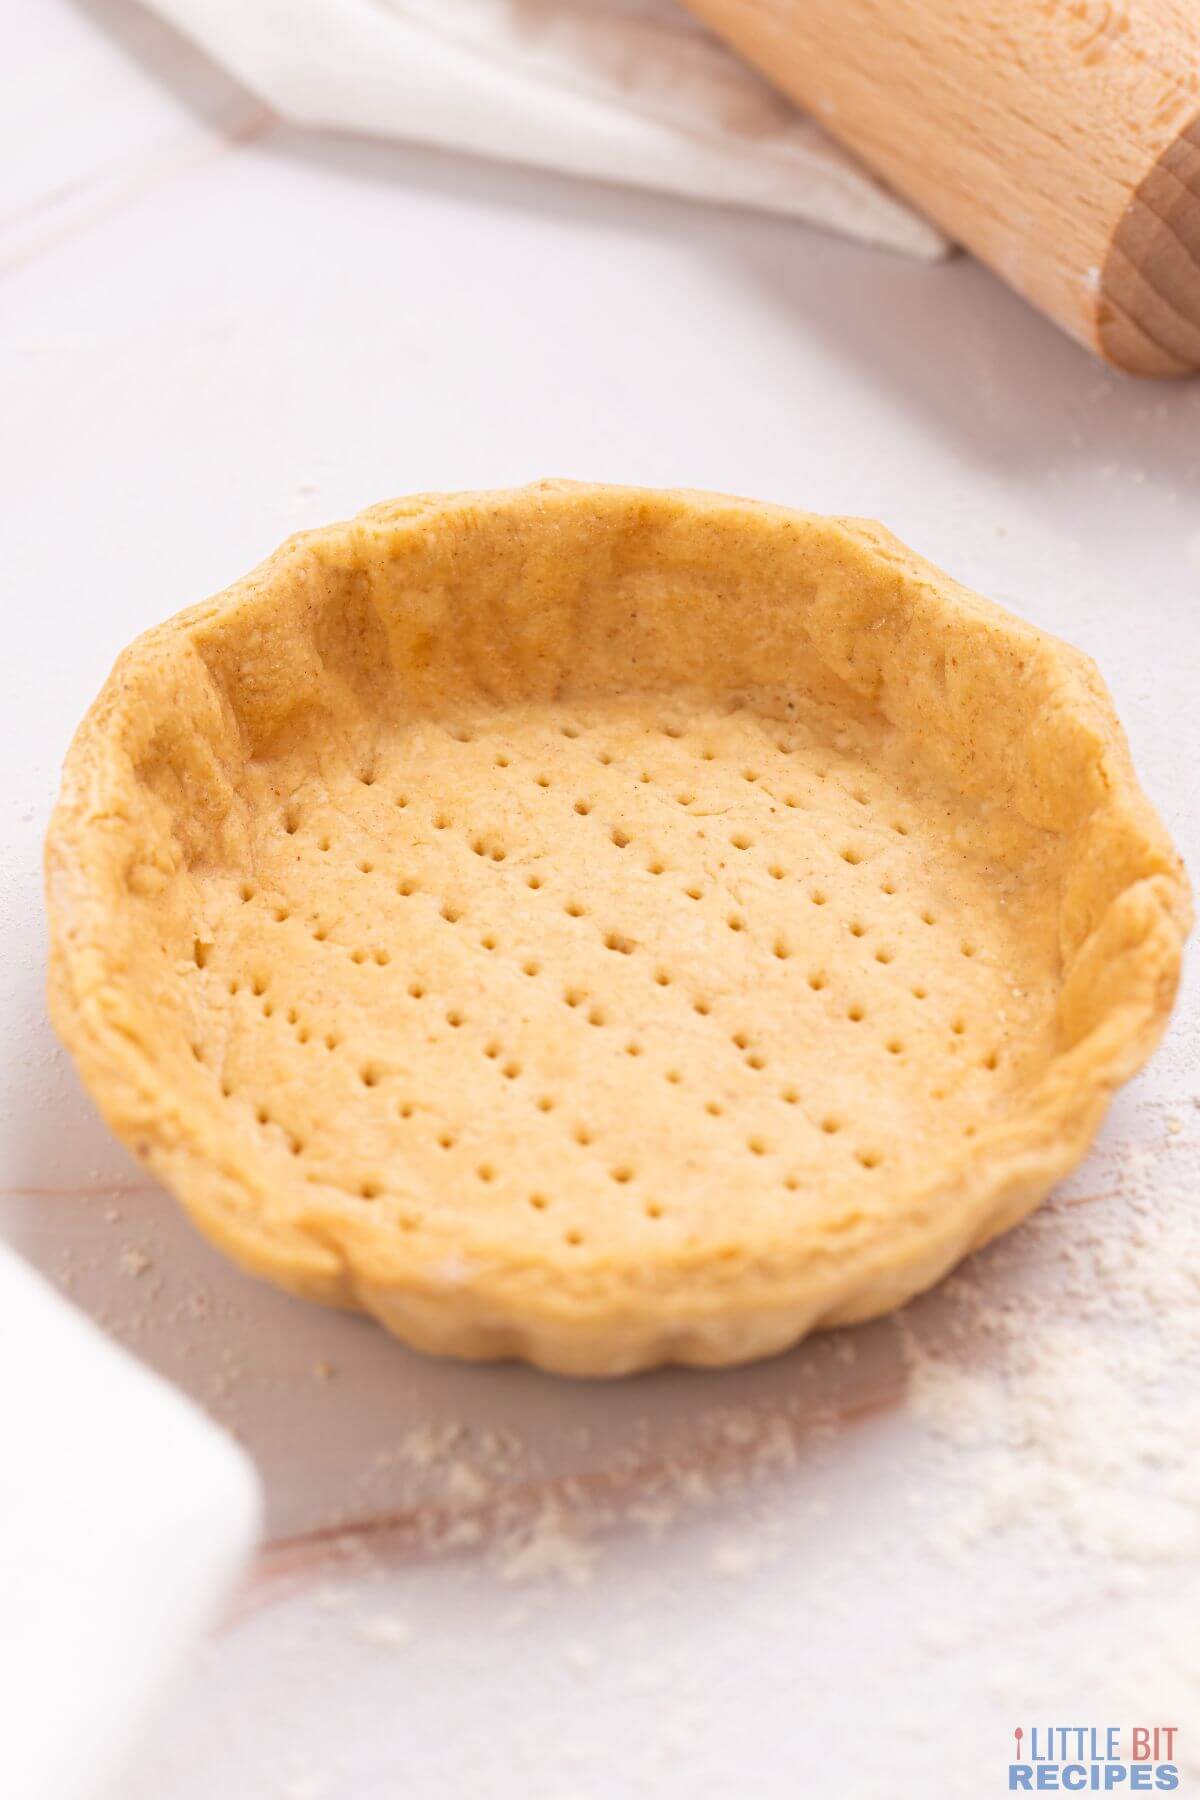
Roll the dough ball with a rolling pin to ⅛-inch thickness. Transfer to a mini pie dish.
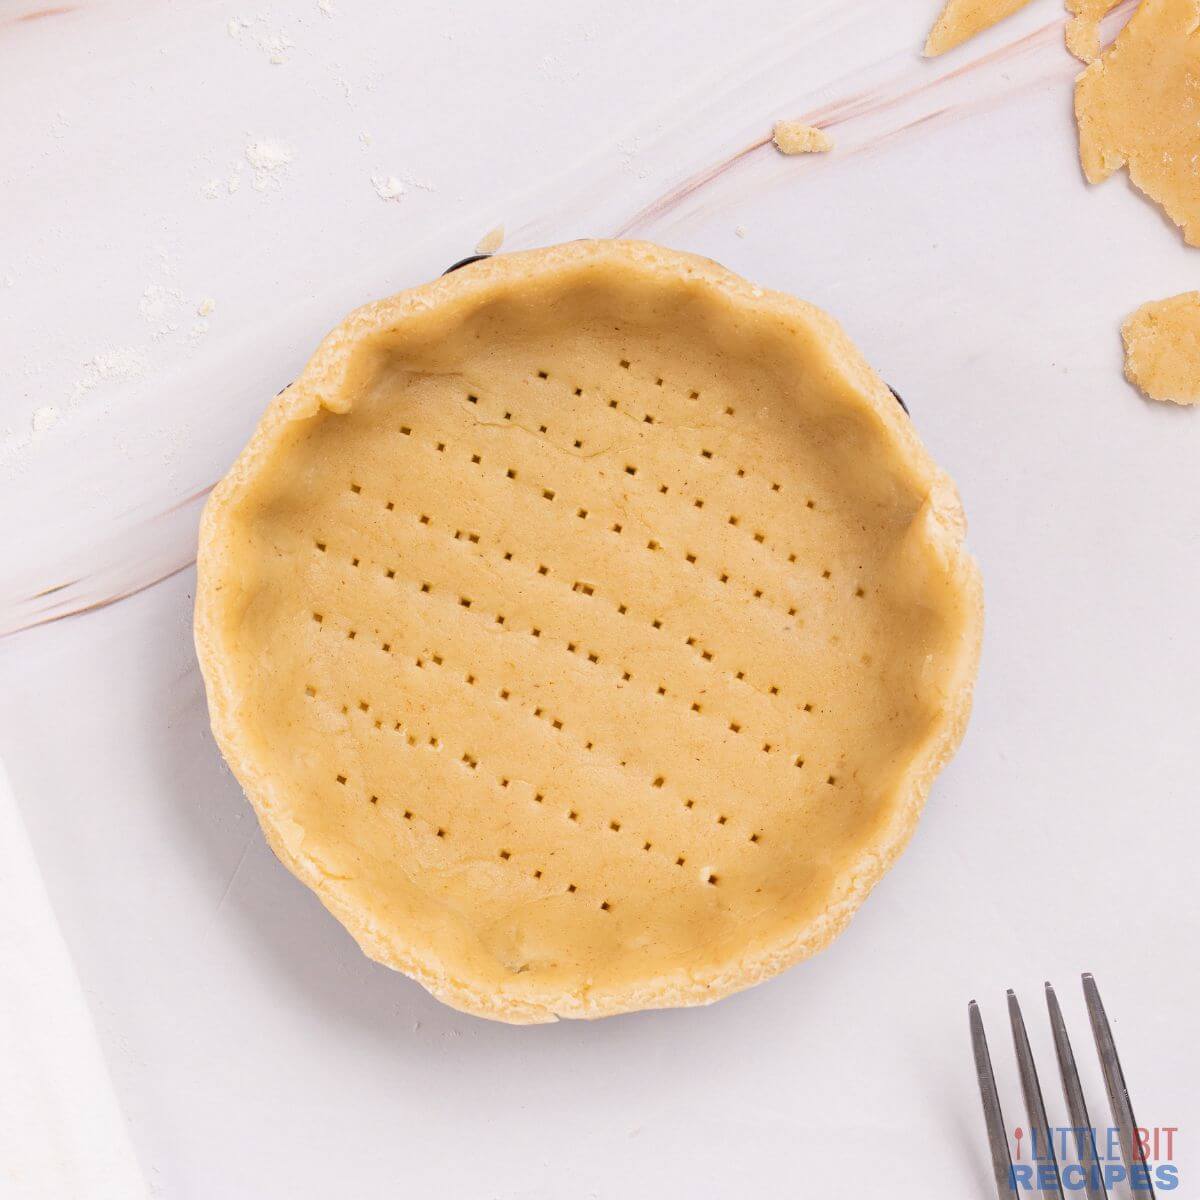
Pierce the dough base and press it into the pie dish, cut the extra excess dough, but leave about ½-inch all the way around, tuck inside and crimp the edges.
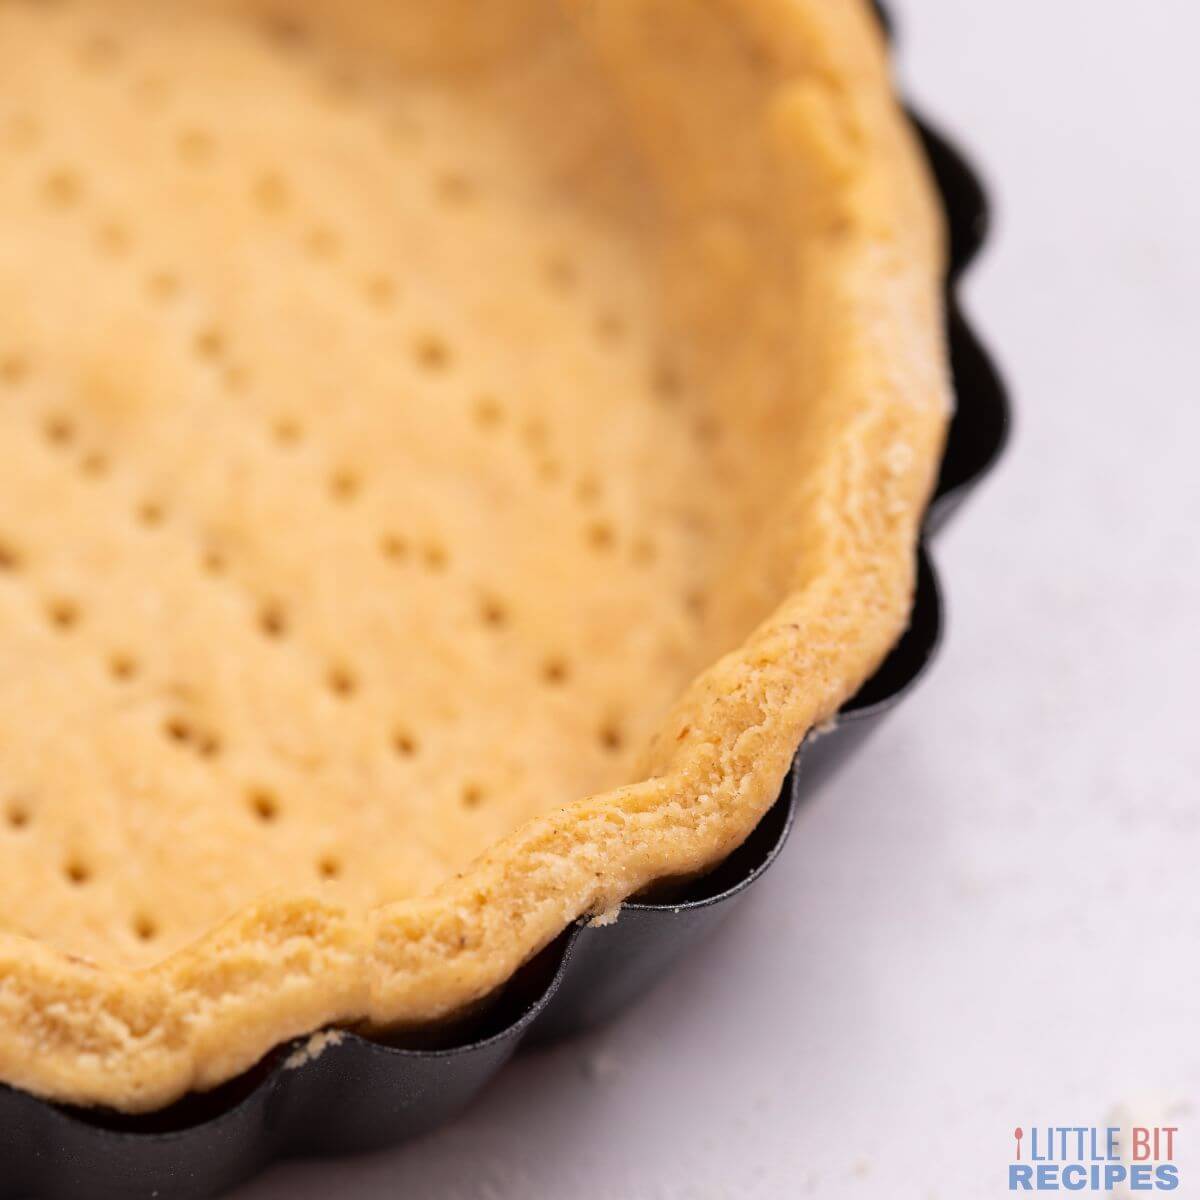
Bake in preheated oven until crust is light brown, about 8 to 10 minutes.
Variations
There are many ways to change up a mini pie crust recipe. Here are a few variations to try:
For a chocolate mini pie crust, simply substitute cocoa powder for the flour. This will give the crust a rich chocolate flavor that is perfect for filling with a creamy chocolate filling.
For a nutty mini pie crust, substitute chopped nuts for the flour. This will give the crust a crunchy texture and nutty flavor that goes well with fruit or custard fillings.
For a gluten-free mini pie crust, substitute gluten-free flour for the regular flour. This will make the crust suitable for those with celiac disease or gluten intolerance.
Tips
When it comes to making mini pie crust, there are a few things you can do to ensure your crust is perfect every time. Here are some tips to help you make the best mini pie crust:
- Use a food processor to mix your ingredients together. This will ensure that the mixture is well combined and results in a smoother dough.
- Add more flour if needed. If you find that the dough is too sticky, add a little more flour until it reaches the desired consistency.
- Press into pie pan evenly. Once the dough is ready, use a fork or your fingers to press it into the bottom and up the sides of your mini pie dish. Be sure to evenly distribute the dough so that it bakes evenly.
- Preheat your oven before baking the plain crust or pie to ensure that they cook through properly.
Serving Suggestions
There are many ways to use a mini pie crust recipe to create delicious single serving pies. Quiche and tarts are always popular, but pot pies are a great way to change things up.
Fill the crust with your favorite egg and cheese mixture to make a quiche. Add in some chopped ham or bacon for extra flavor. Our mini frittatas recipe would be an excellent filling idea. Or try making an individual Captain Rodney's Boucan Chicken Quiche for two.
For a tart like Hokkaido baked cheese tarts or a strawberry galette, try using a fruit filling or even chocolate pudding. Top with whipped cream or a sprinkle of cinnamon for extra sweetness.
Pot pies are perfect for individual servings. Simply fill the crust with your favorite meat and vegetable combination. Top with another piece of dough, cut slits for ventilation, and bake until golden brown. Serve with a side of mashed potatoes or green beans for a complete meal.
Storage
The crust can be stored either unbaked or baked.
Unbaked
Unbaked mini pie crusts can be stored in the refrigerator for up to 2 days or in the freezer for up to 3 months.
To store unbaked mini pie crust in the refrigerator, place in a mini pie dish and cover well with plastic wrap. To store unbaked mini pie crust in the freezer, place in disposable pans and freeze until solid. Then, transfer to a freezer-safe bag and label with the date.
Baked
Baked crust can be stored at room temperature for up to 2 days or in the freezer for up to 3 months.
To store baked, place the crust on a wire rack and let cool completely. Then, wrap tightly with plastic wrap or place in an airtight container.
FAQ
There are a few different ways to make mini pie crusts, but one of the easiest is to use a food processor. Simply add your ingredients to the food processor and pulse until the dough comes together. Then, roll out the dough, press into a pan, and bake.
A pie crust will last for about 2-3 days in the fridge or up to 3 months in the freezer. If you are planning on freezing your pie crust, it is best to wrap it tightly in plastic wrap or aluminum foil.
Making desserts such as fruit pies, custard pies, and shells for unbaked fillings is a great way to use them. Savory dishes like individual quiche and pot pies are another popular use.
Related Recipes
This recipe can be used for savory small batch recipes or desserts. Here's a couple suggestions.
- Single serve apple pie
- Chili for two pot pies.
Recipe

Mini Pie Crust
Ingredients
- ¾ cups all-purpose flour
- ¼ teaspoon salt
- 1 ½ tablespoon cold unsalted butter cubed (use shortening for dairy-free)
- ⅛ cup + 1 tablespoon vegetable shortening chilled
- ⅛ cup iced water
Instructions
- Add the flour and salt to the jug of a food processor or see note for manual method. Pulse to combine.
- Add the cold butter and shortening to the mixture, and pulse until it resembles coarse sand. Continue pulsing and pour cold water, one tablespoon at a time until the dough comes together into a ball. You may not use all of the water.
- Remove from the processor, wrap it in plastic wrap and chill in the fridge for 2h or 15 minutes in the freezer.
- Preheat the oven to 375ºF.
- Transfer the dough to a lightly floured surface, and roll it with a rolling pin to ⅛-inch thickness.
- Pierce the dough base and press it into the pie dish, cut the extra excess dough, but leave about ½-inch all the way around, tuck inside and crimp the edges.
- To bake the crust without a filling, fill the crust with ceramic baking beans, dried rice or beans to weigh the pastry down. Bake for 8 to 10 minutes until light brown, remove from the oven and place on wire rack to cool.


Molly Pisula says
This is a perfect tiny pie crust recipe! Made this for an apple pie for one, and it worked perfectly!
Journa Liz Ramirez says
I had fun making this mini pie crust. It's so easy to make and it is so tasty. Satisfyingly good! Thanks Lisa for this wonderful recipe!
Allyssa says
Really loved this amazing mini pie crust! Very easy to make and tasted really delicious! Loved this, thanks a lot!
Wendy says
Easy and delicious! I will make this again.
Greta says
This recipe is perfect for the pie that I want to make, so I'll save it. Thanks for the recipe!