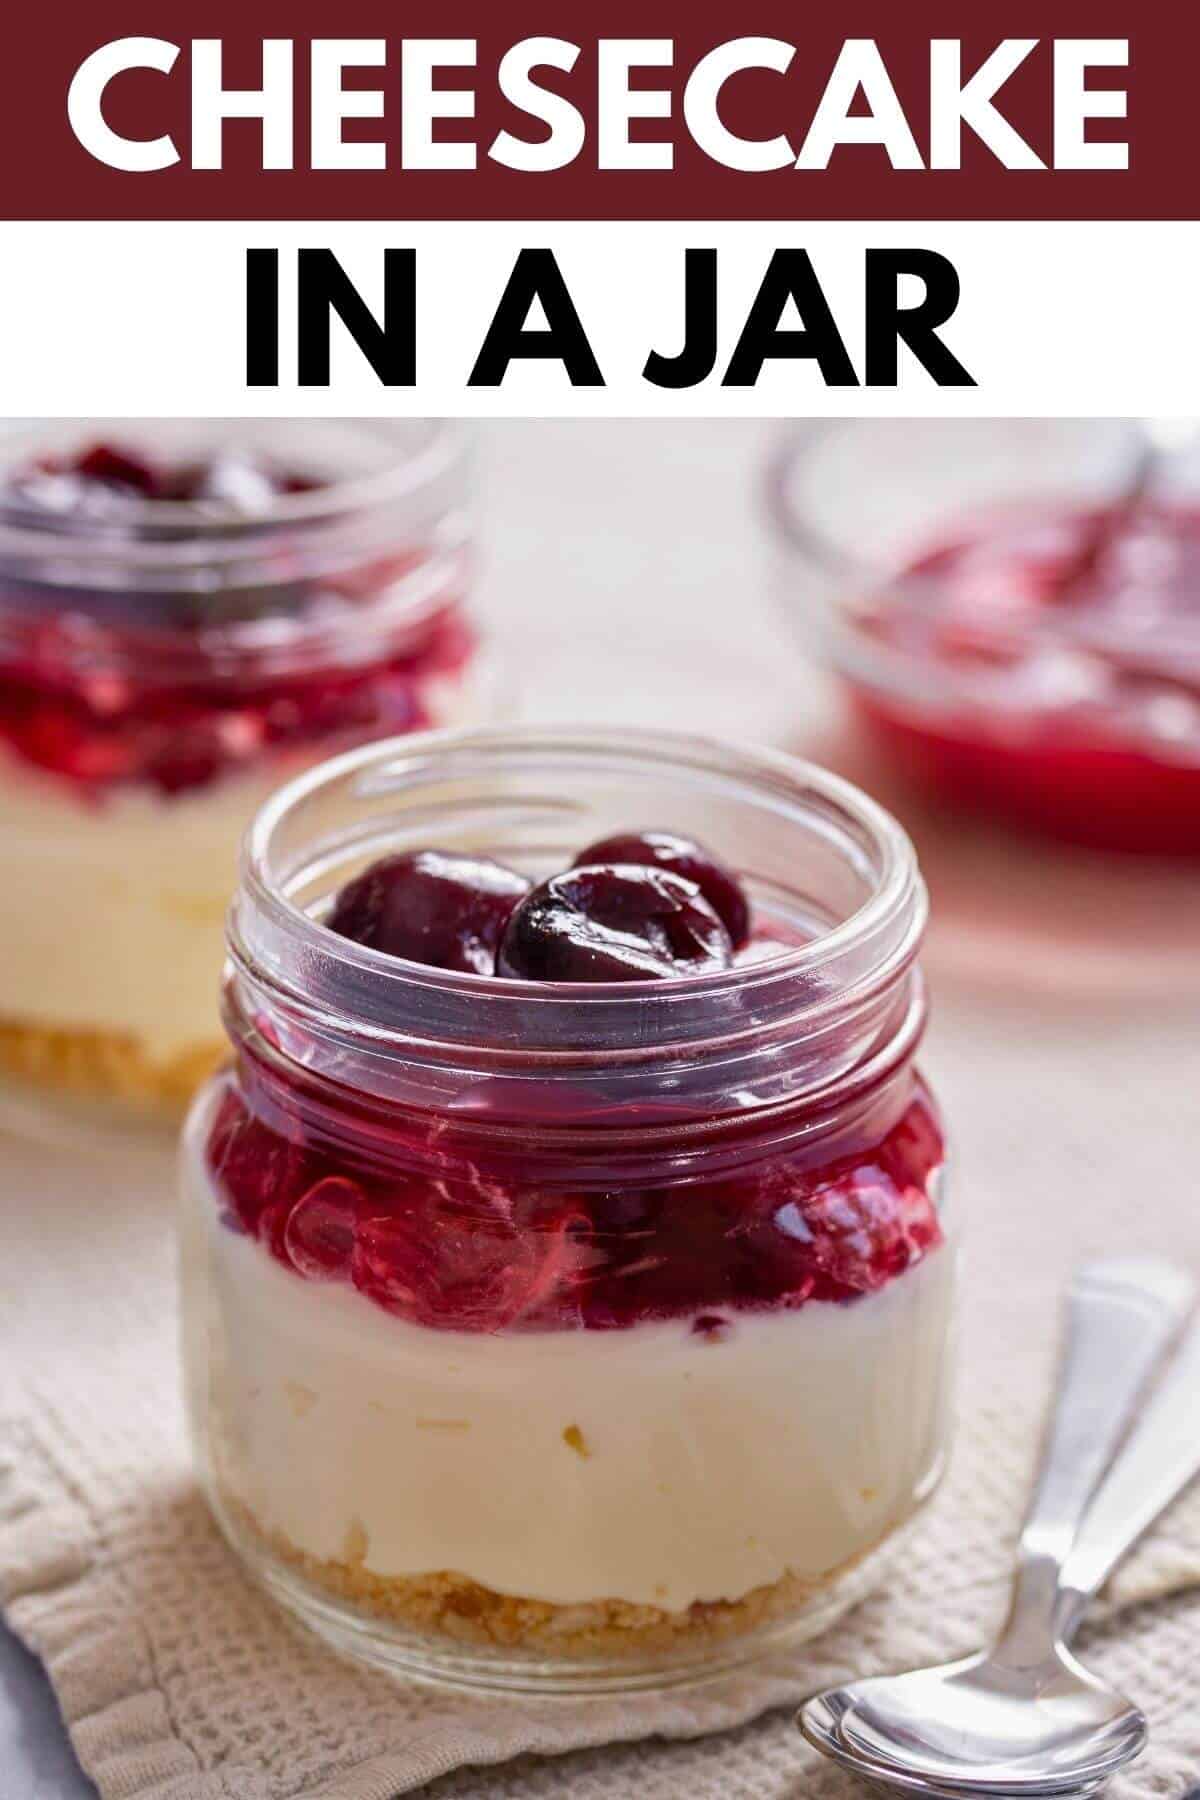
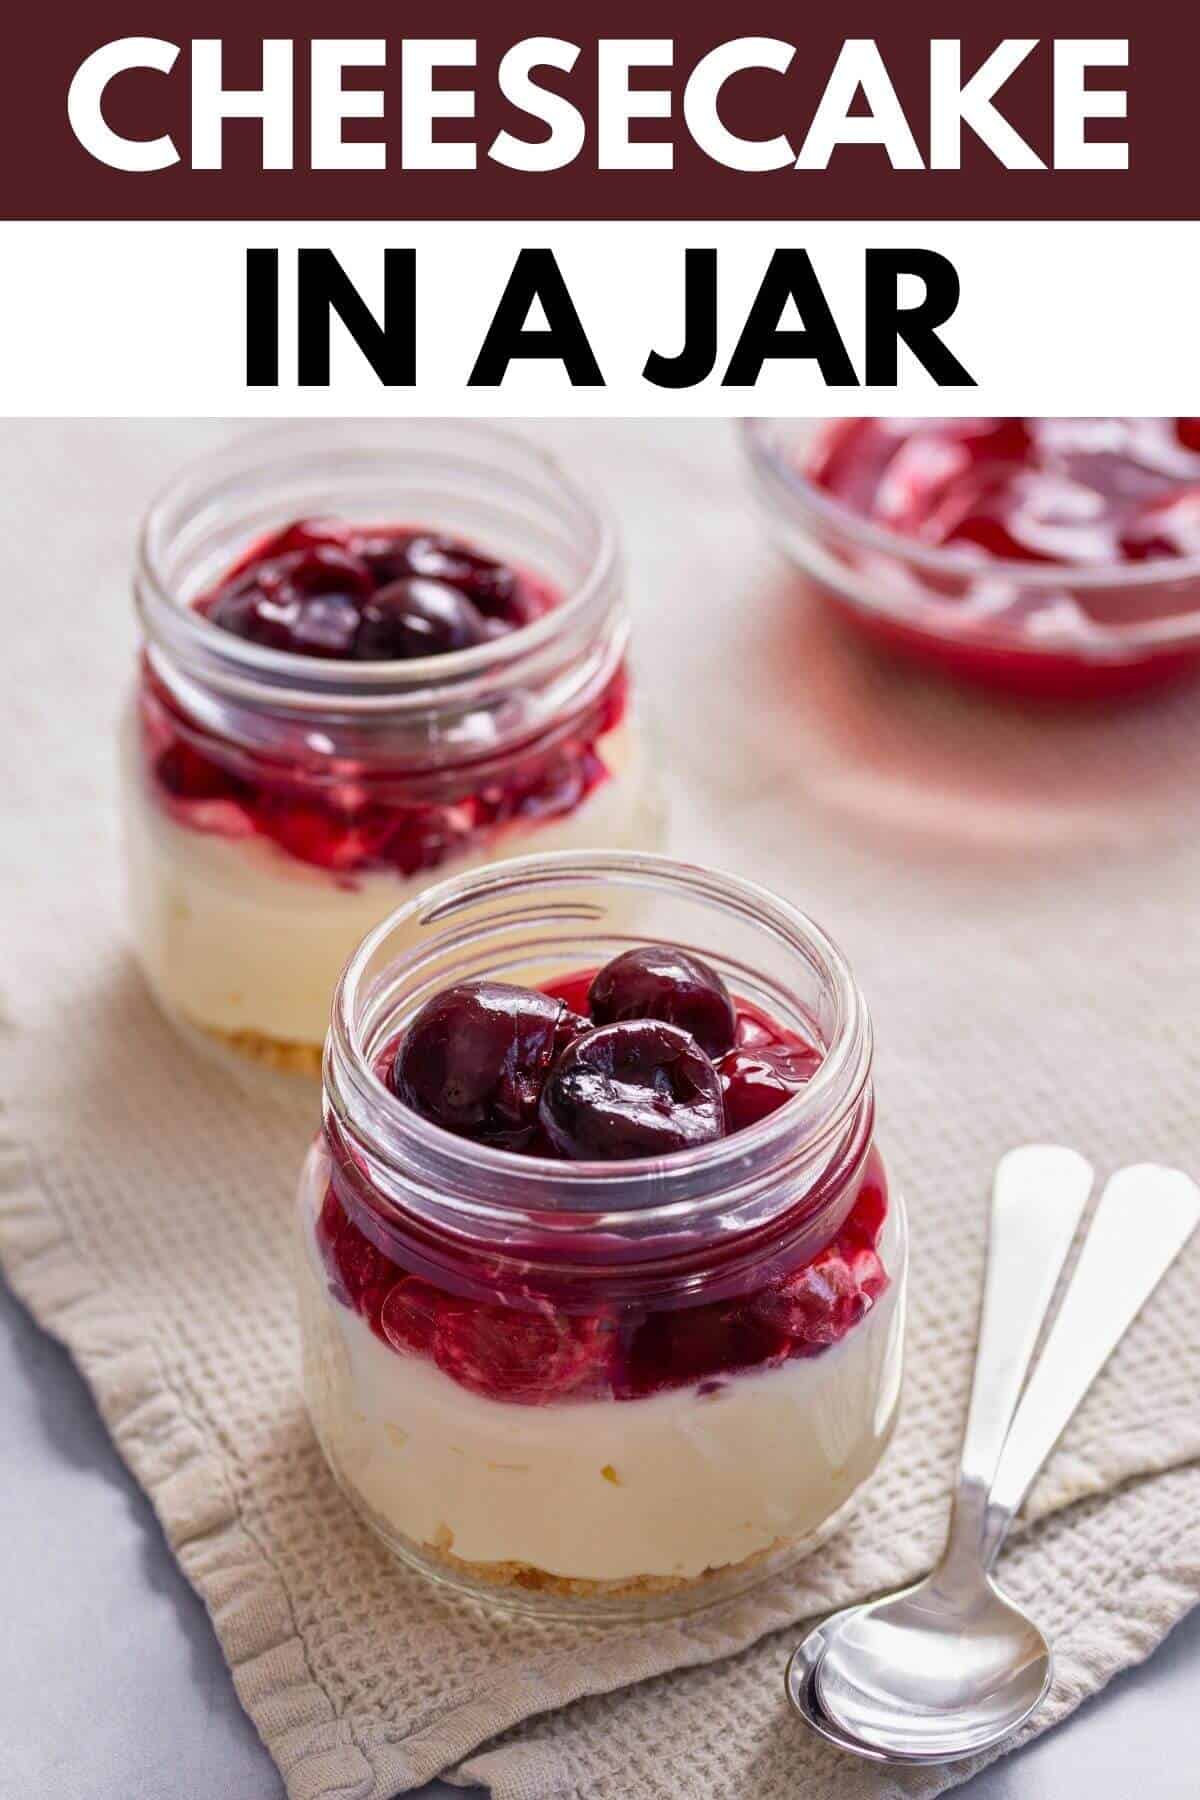
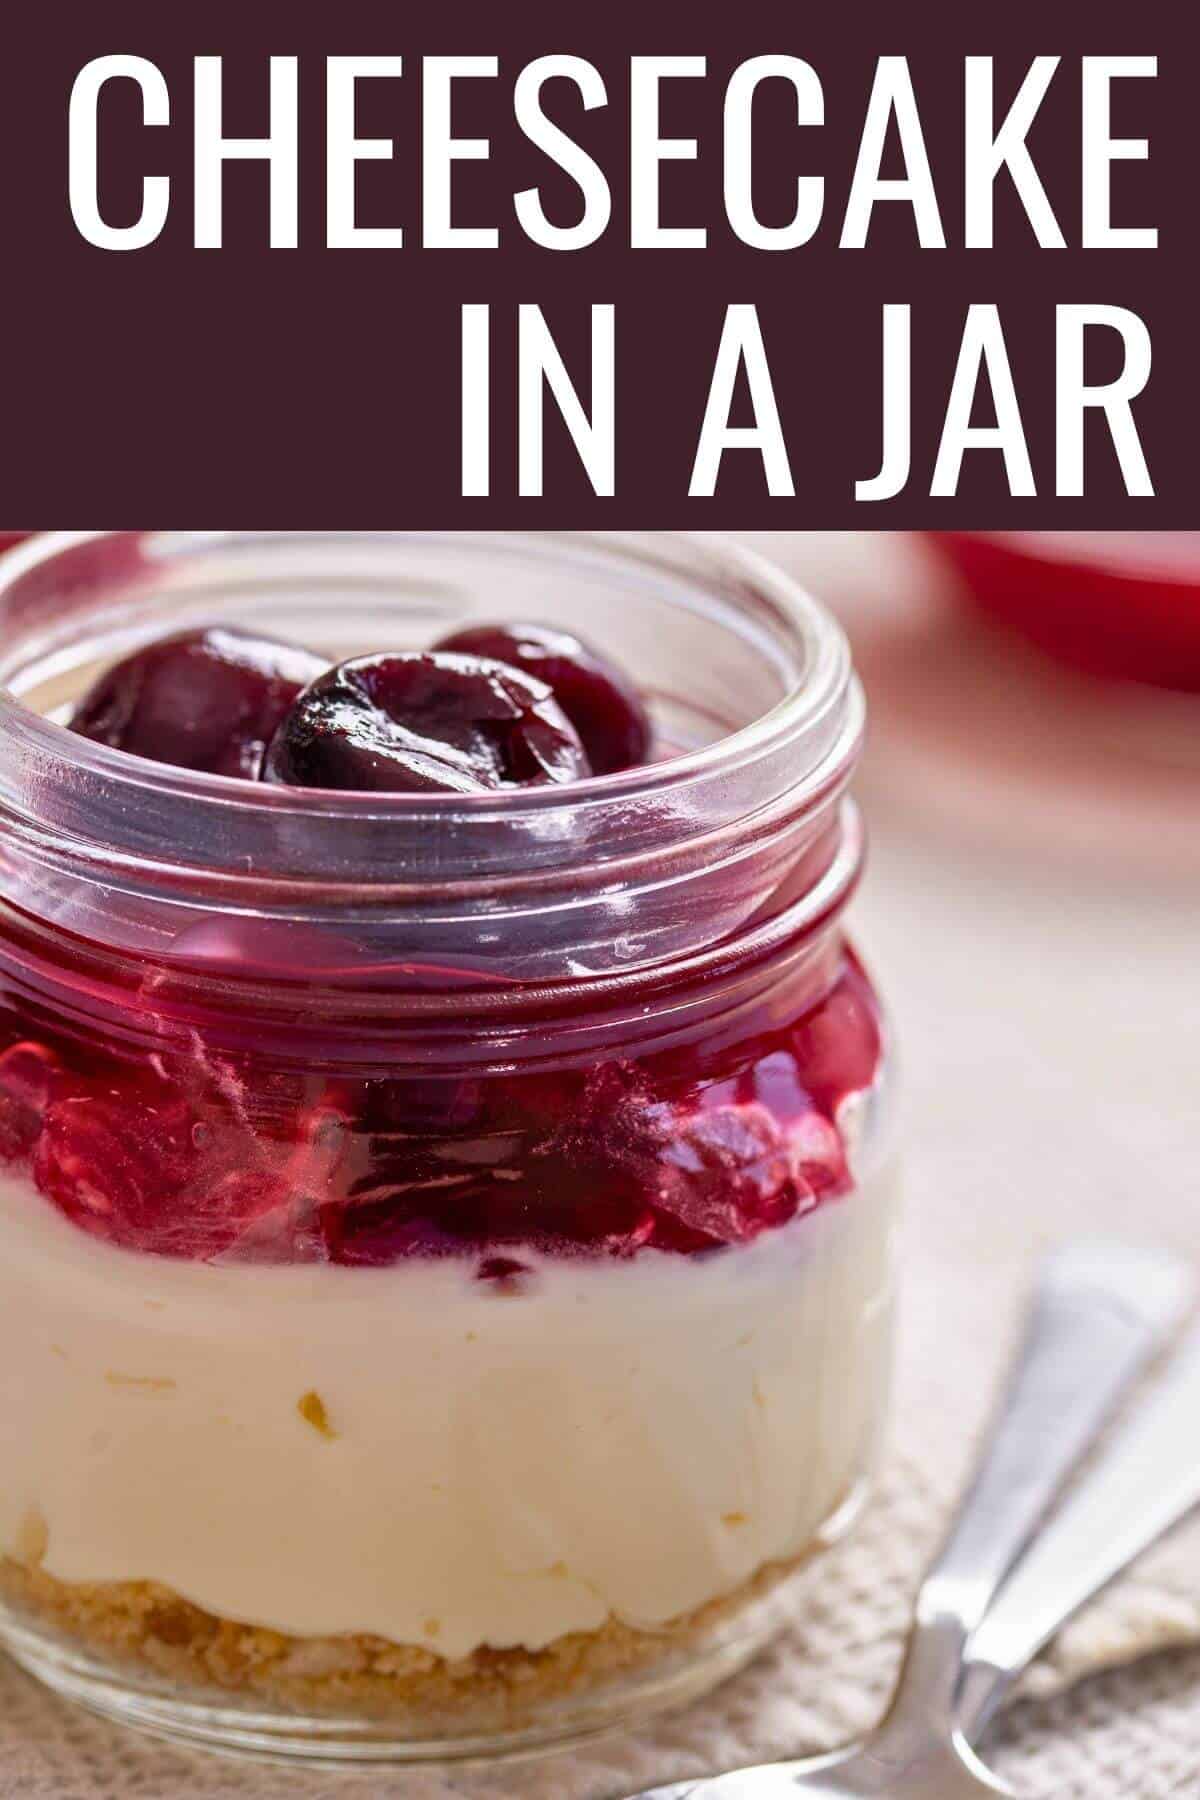
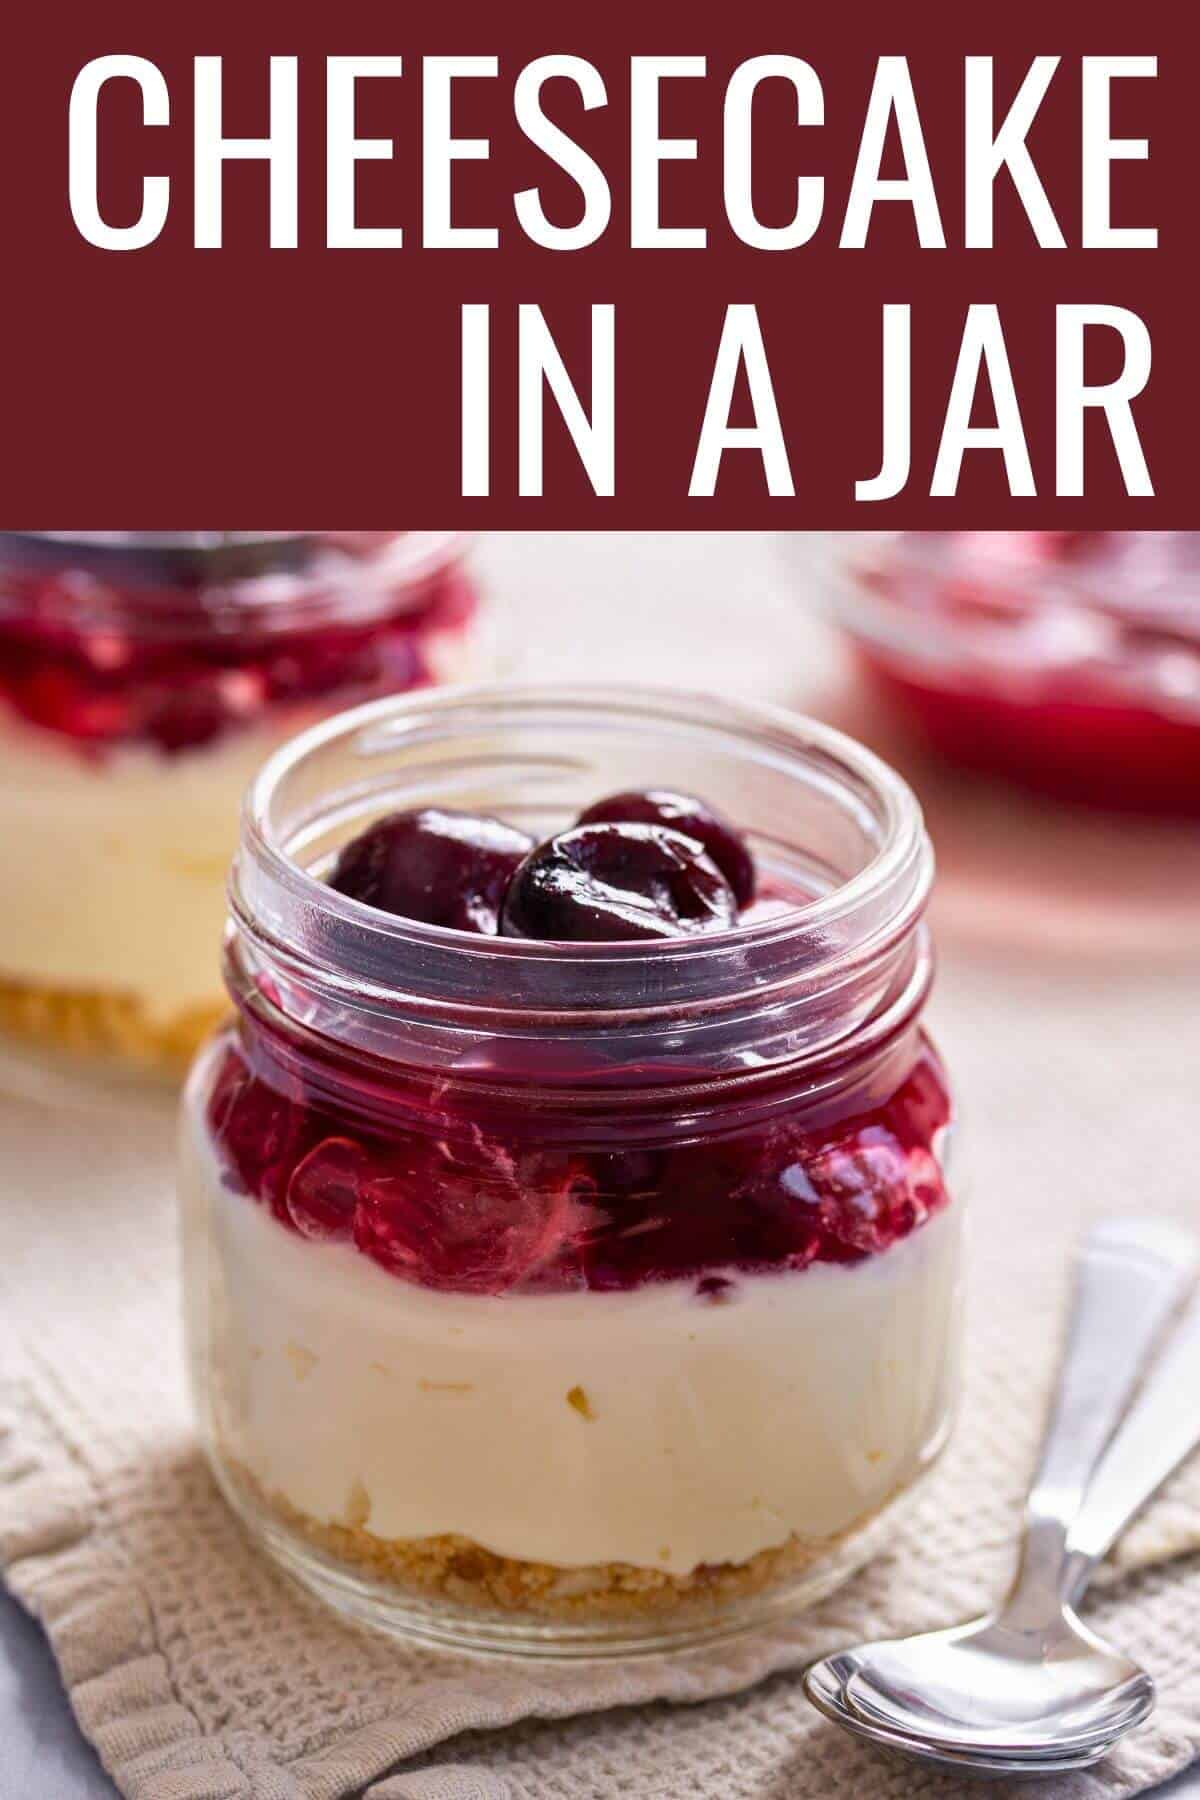
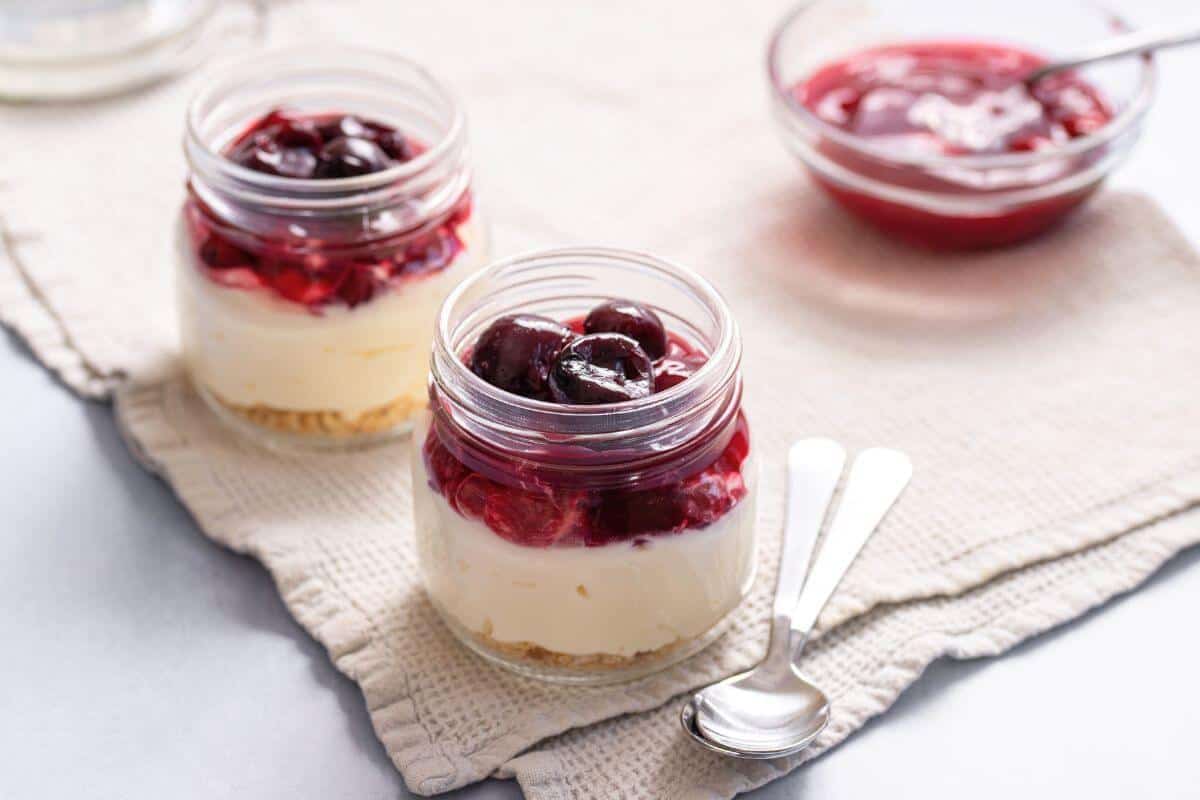
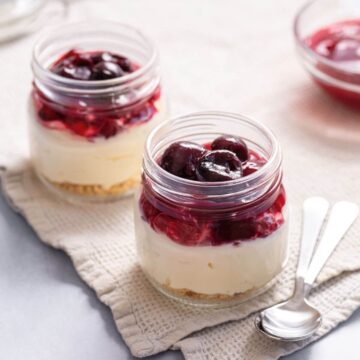
Indulge in this delicious no-bake cheesecake in a jar. You'll love the creamy texture and flavor of this easy-to-make dessert. It's perfect for any occasion.
Want to save this post?
Enter your email below and get it sent straight to your inbox. Plus, I'll send you the latest recipes and tips every week!
Who doesn't love cheesecake? It's rich, creamy, and oh-so-satisfying. But have you ever tried no bake cheesecake made in a jar?
This trendy dessert takes the traditional cheesecake and turns it into a portable treat. The crust is made with graham cracker crumbs, giving it that classic flavor we all know and love.
These mini desserts are perfect for those who want to indulge without overdoing it. They're also great times when you want something sweet but not too heavy.
So if you're looking for a delicious, trendy and convenient dessert, you'll want to try this easy cheesecake recipe.
Reasons to Love
- Easy to Make & No Baking Required: This easy no-bake dessert option doesn't require any baking skills.
- Portion Control: Each jar contains just enough for one person.
- Convenient: There's no need to worry about cutting or serving.
- Portable: The compact jar size makes it easy to transport and enjoy on the go.
Ingredients
Let's look at what you'll need to make this recipe.
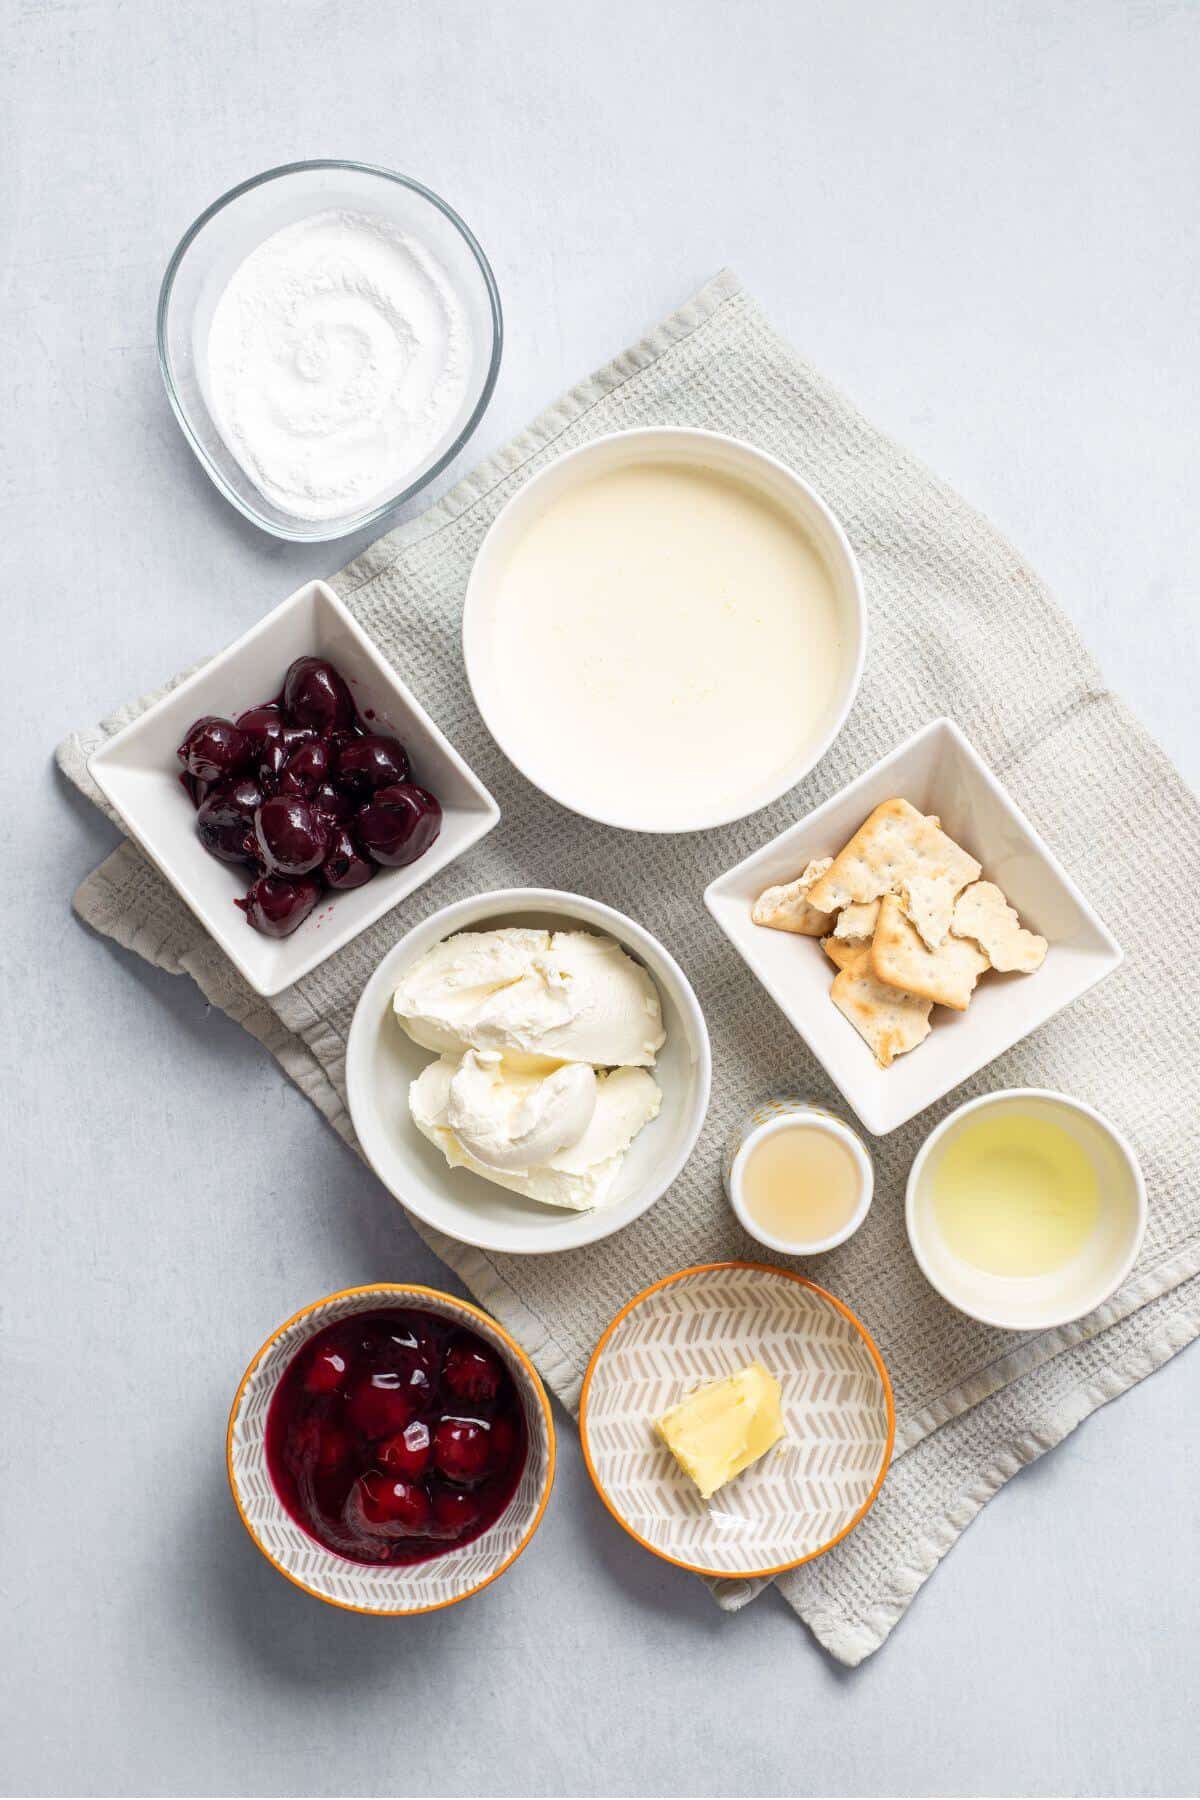
Here are the ingredients required for preparing the no-bake cheesecake jars:
- Cream cheese
- Lemon juice
- Heavy cream
- Powdered sugar
- Vanilla extract
- Butter
- Graham crackers
- Fruit topping or cherry pie filling (optional)
- Tart cherries (optional)
Scroll down to the recipe card for quantities used.
Instructions
Now that you have all the necessary ingredients, let's start start making the recipe.

In a large mixing bowl, use a hand mixer or stand mixer to whip the heavy whipping cream on high speed until it thickens and becomes fluffy.
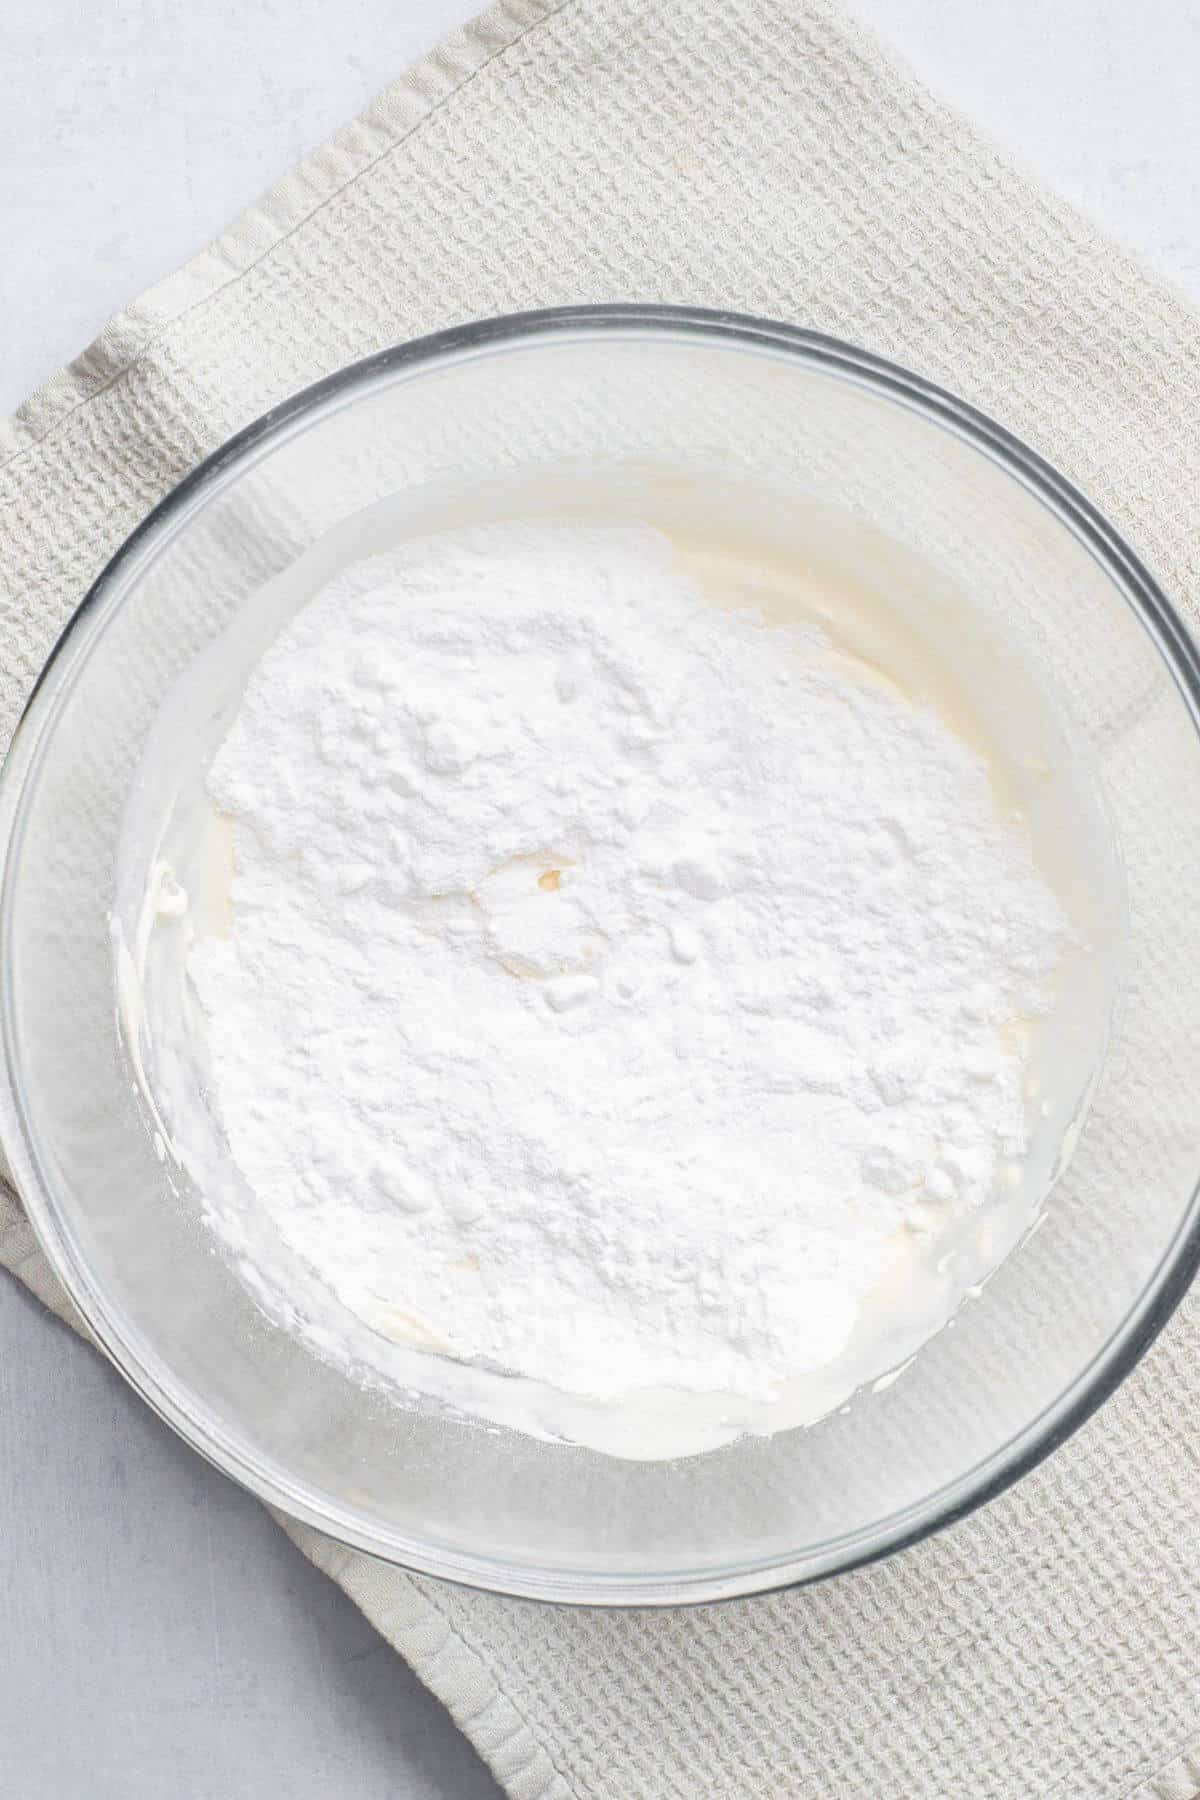
Mix in the vanilla extract and powdered sugar. Begin on low speed until the powdered sugar mixes in, then switch to high speed and continue whipping until stiff peaks form. Set aside.
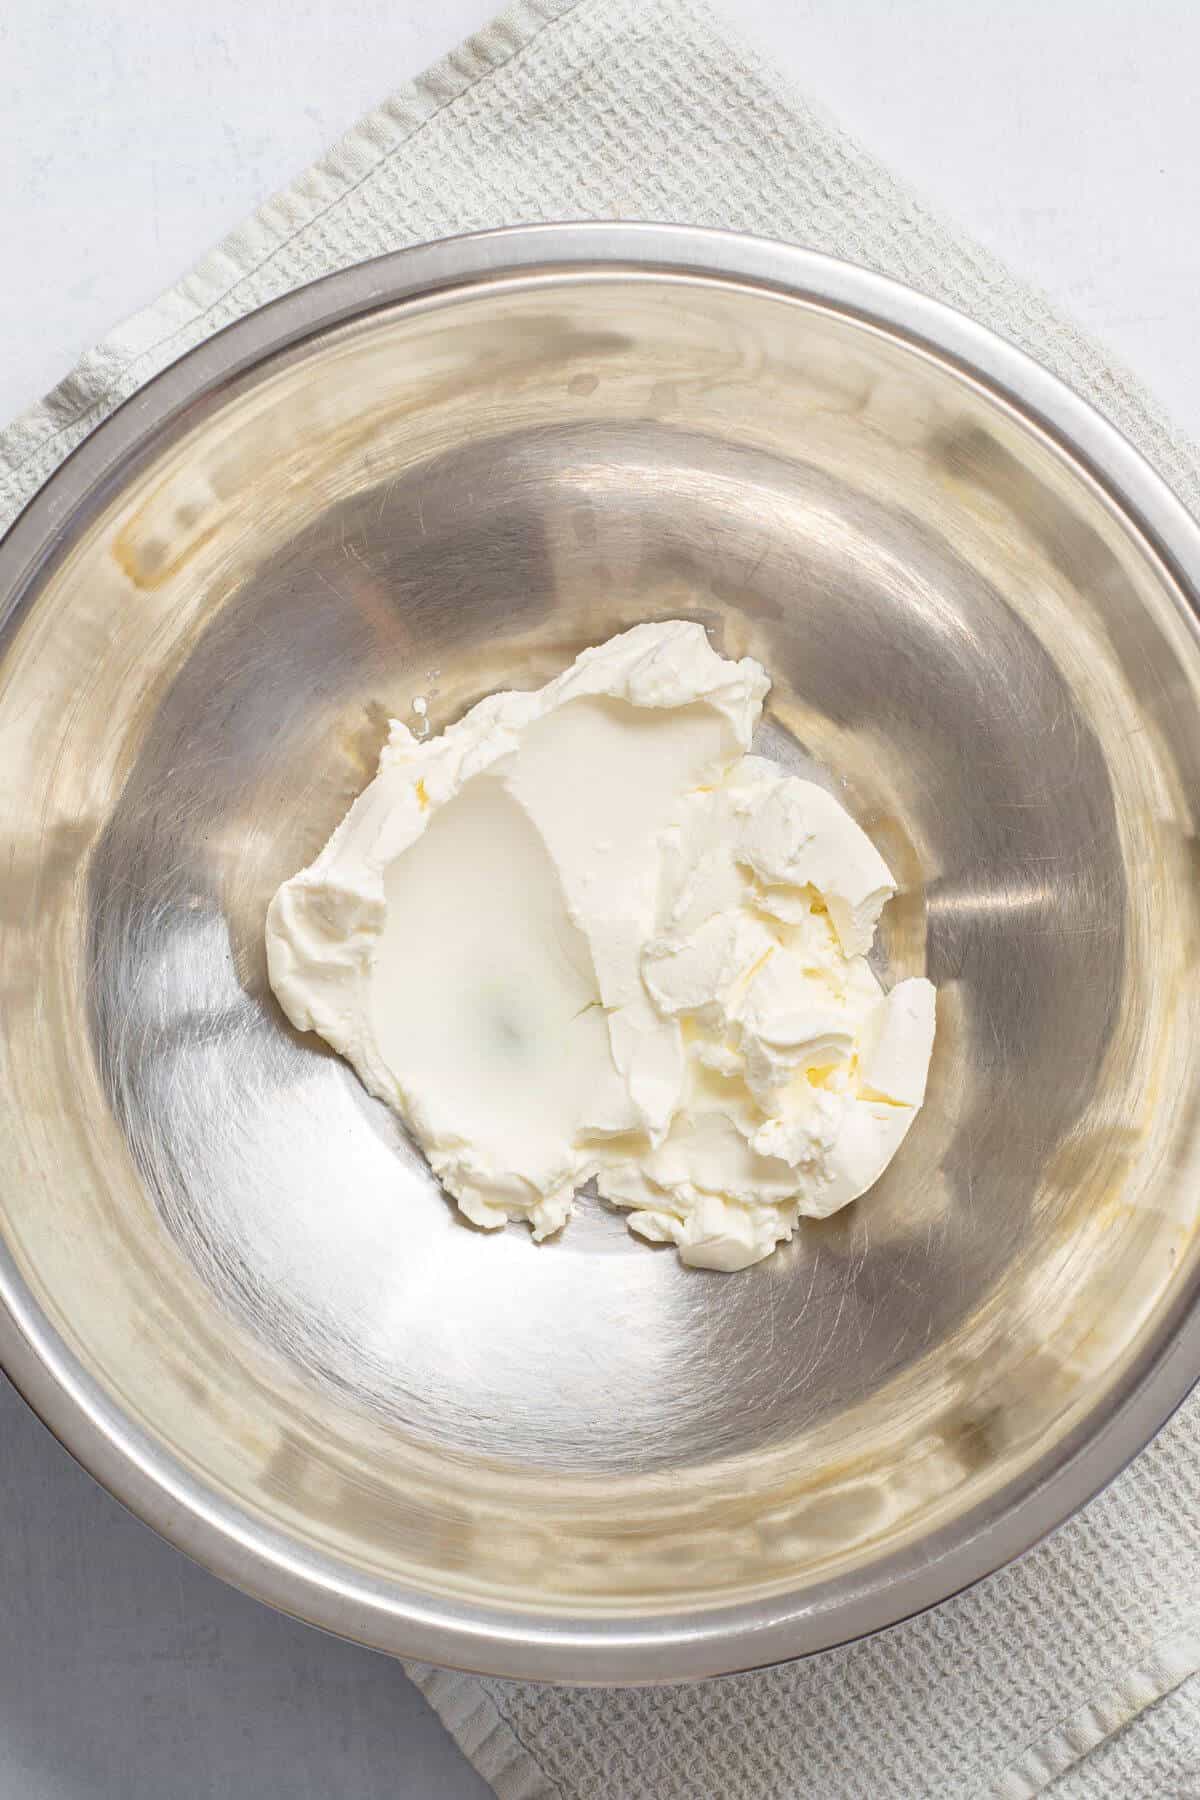
Mix cream cheese and a tablespoon of lemon juice together in another bowl with mixer until it turns soft and creamy.
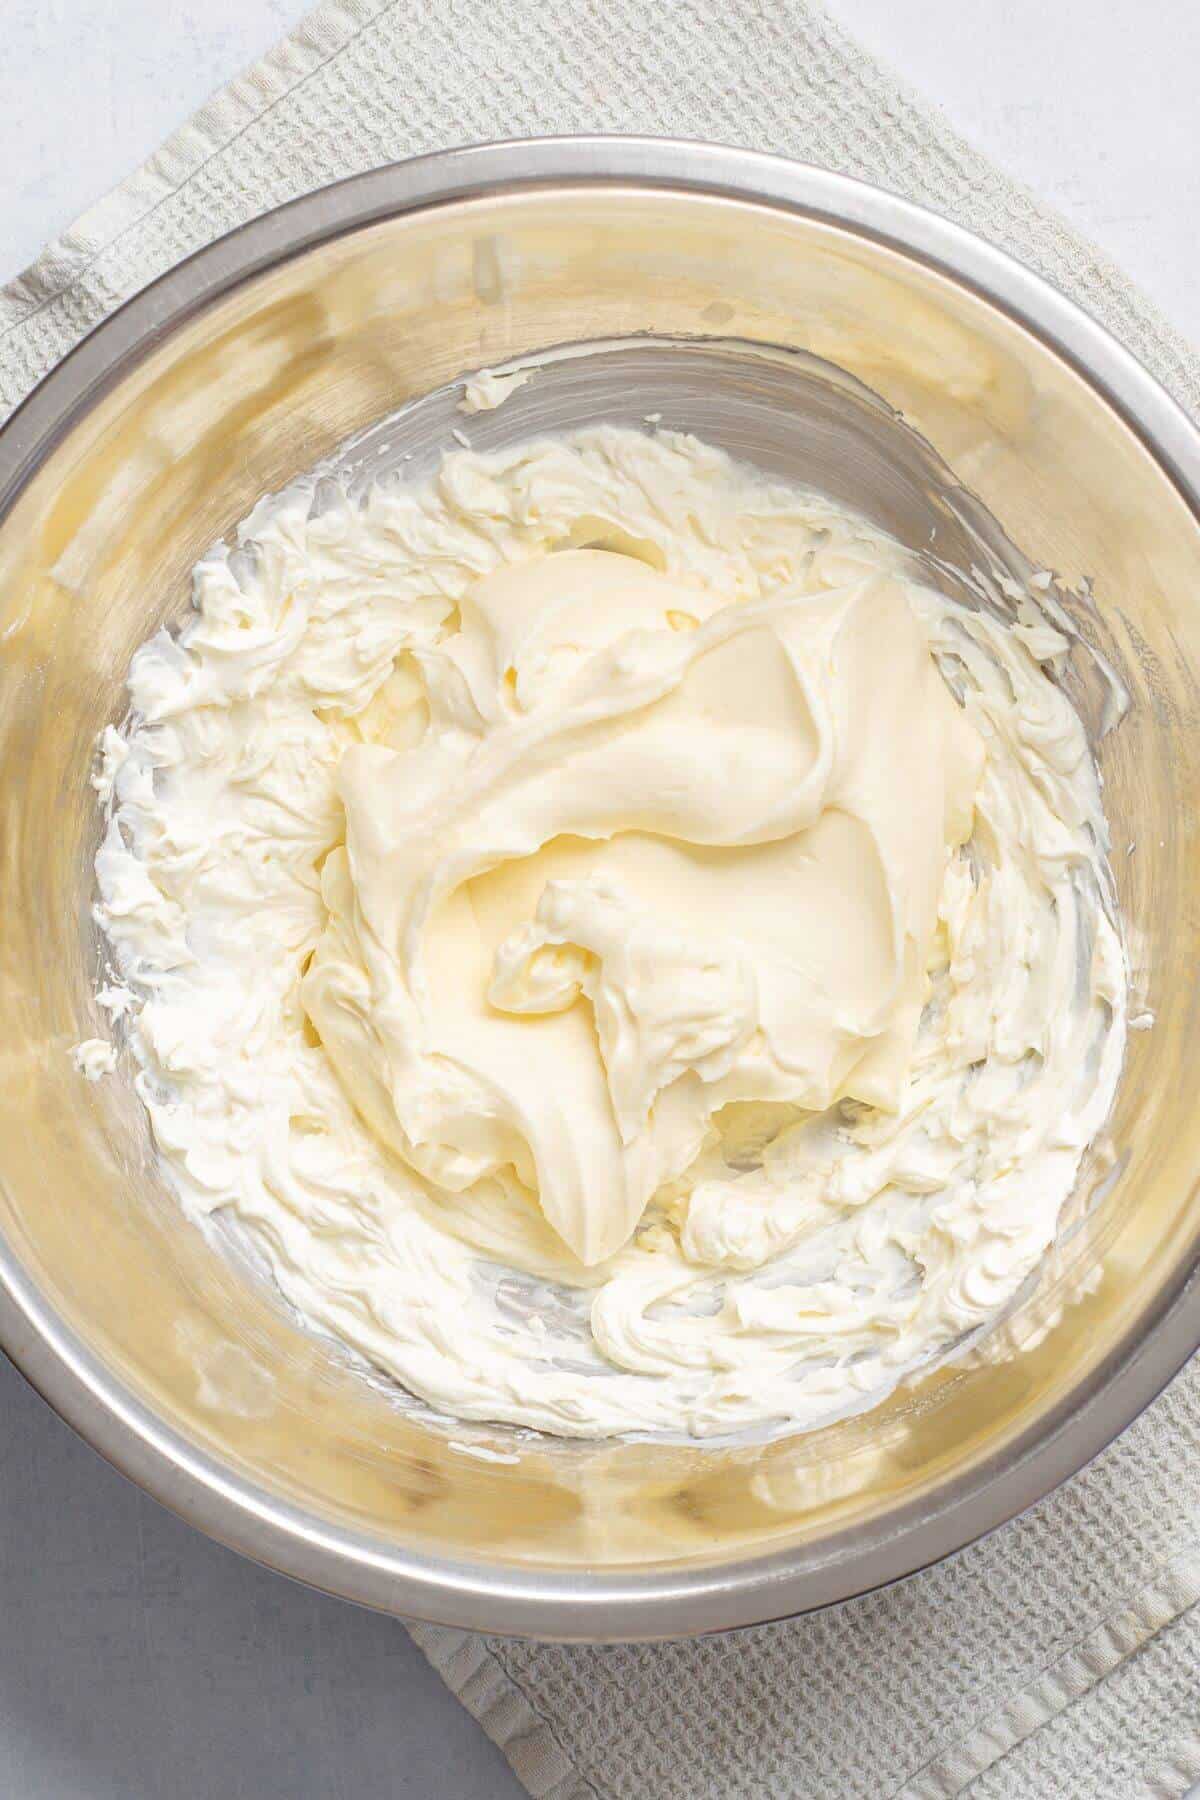
Add the whipped cream to the cream cheese mixture.
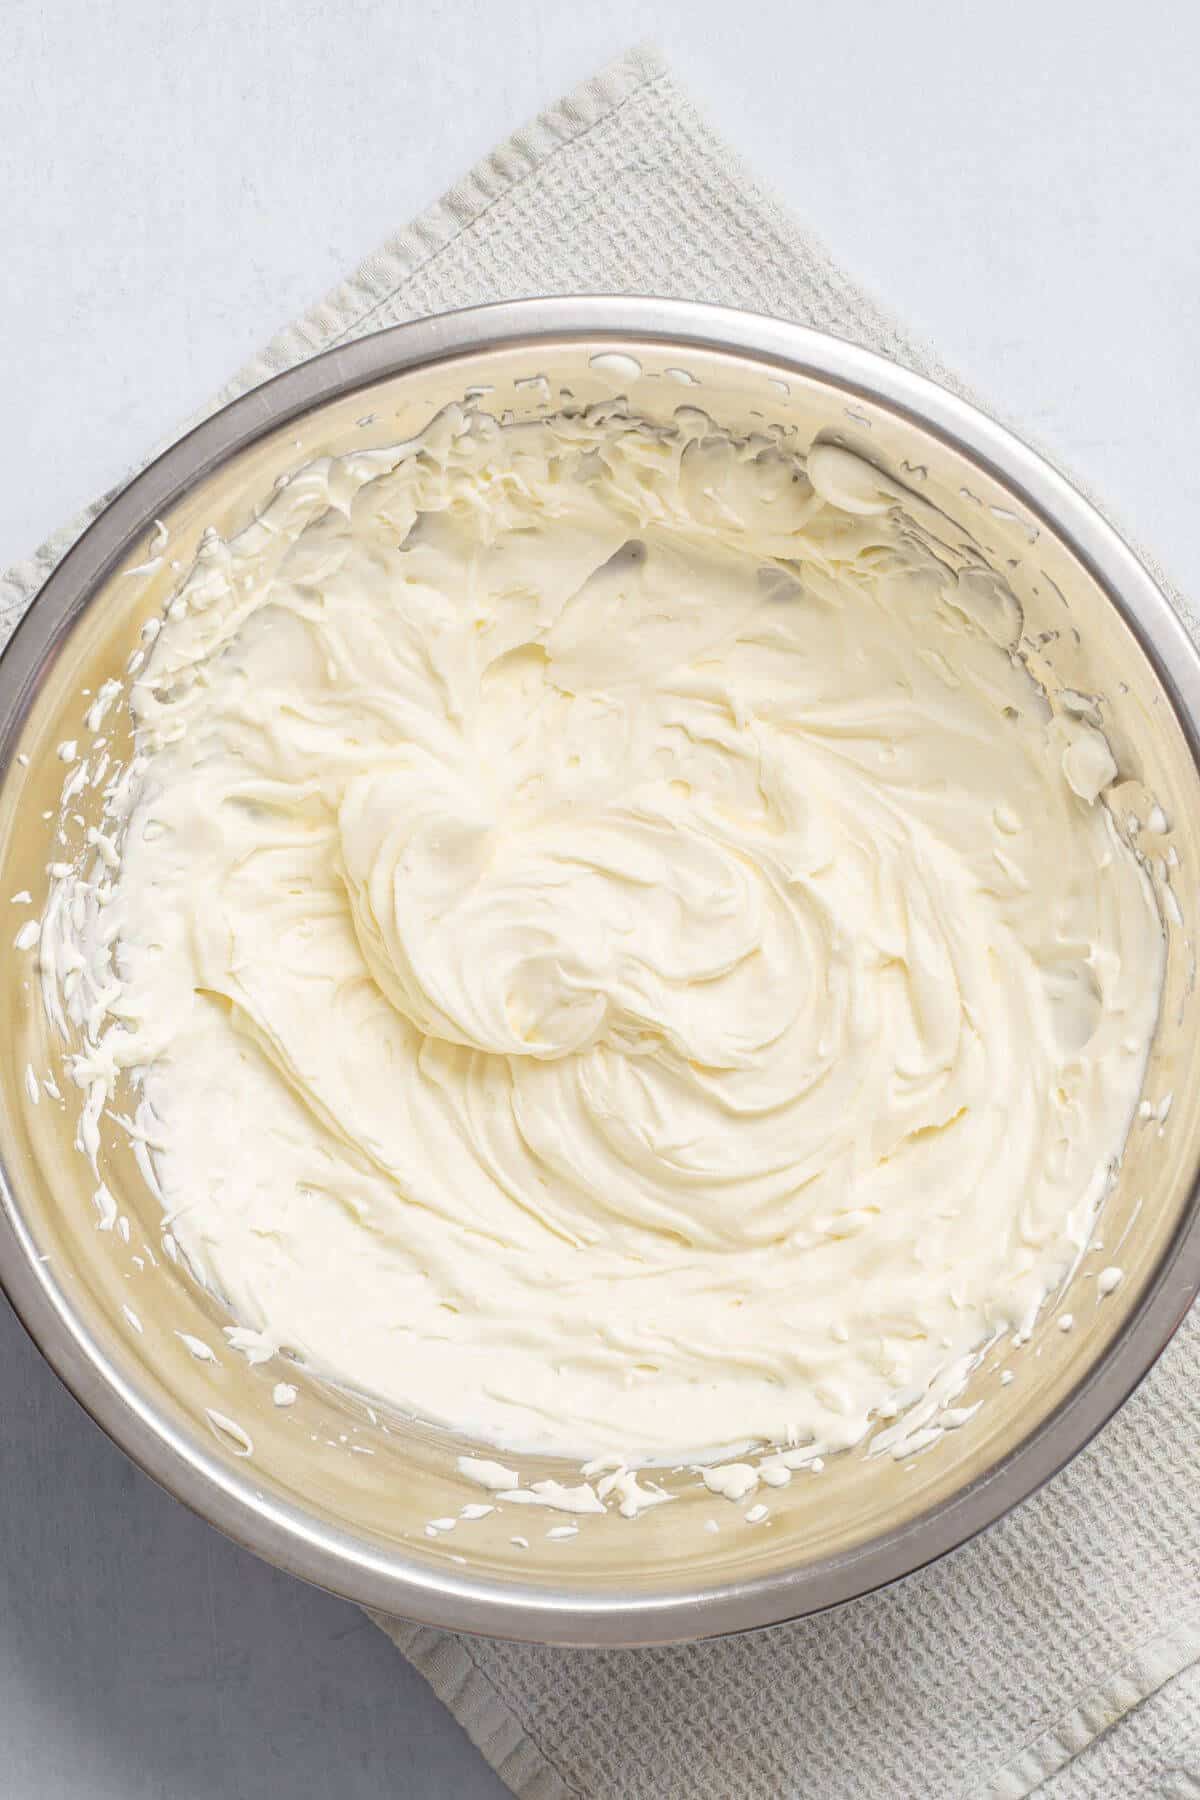
Whip the cream cheese mixture and whipped cream with an electric mixer on medium-high speed until evenly combined.
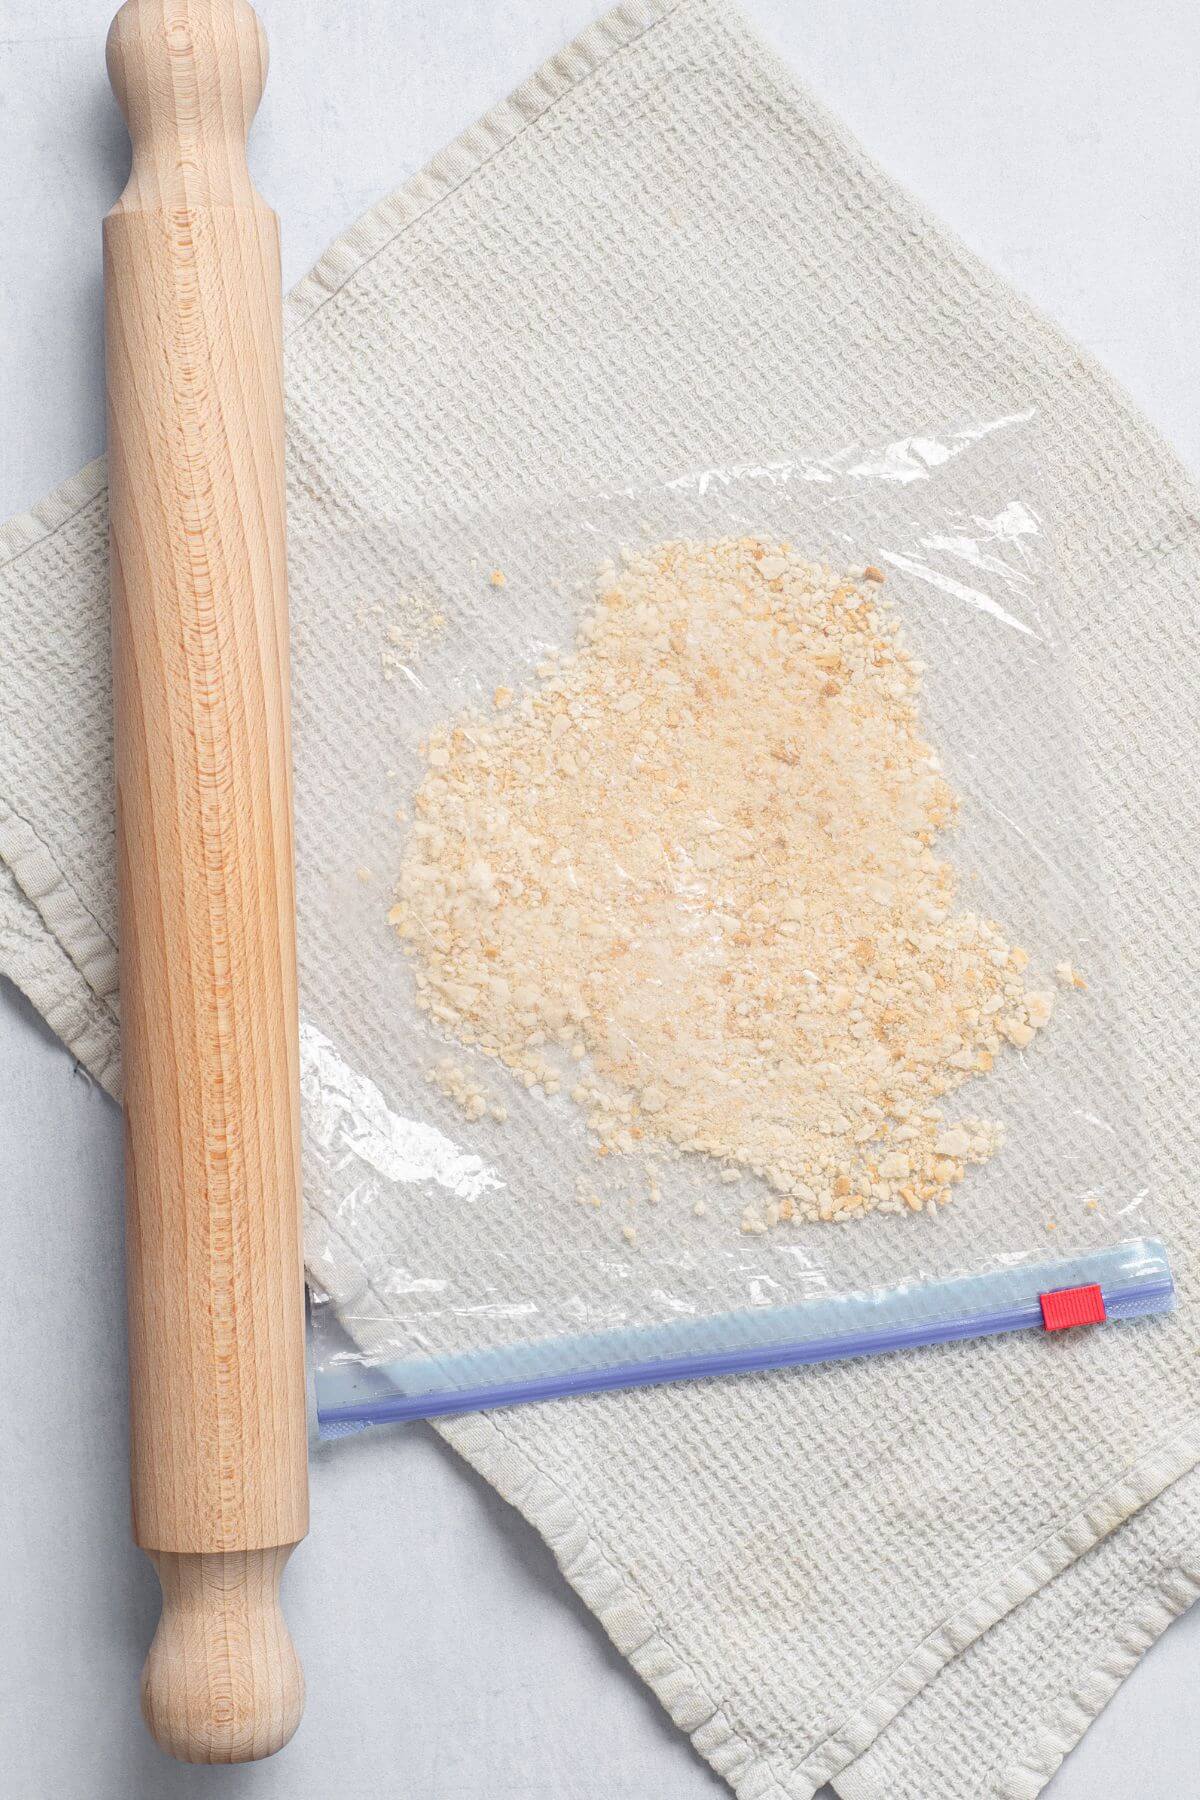
Place graham crackers into a zipper bag and crush them until they become fine crumbs with a rolling pin. A small food processor will work too.
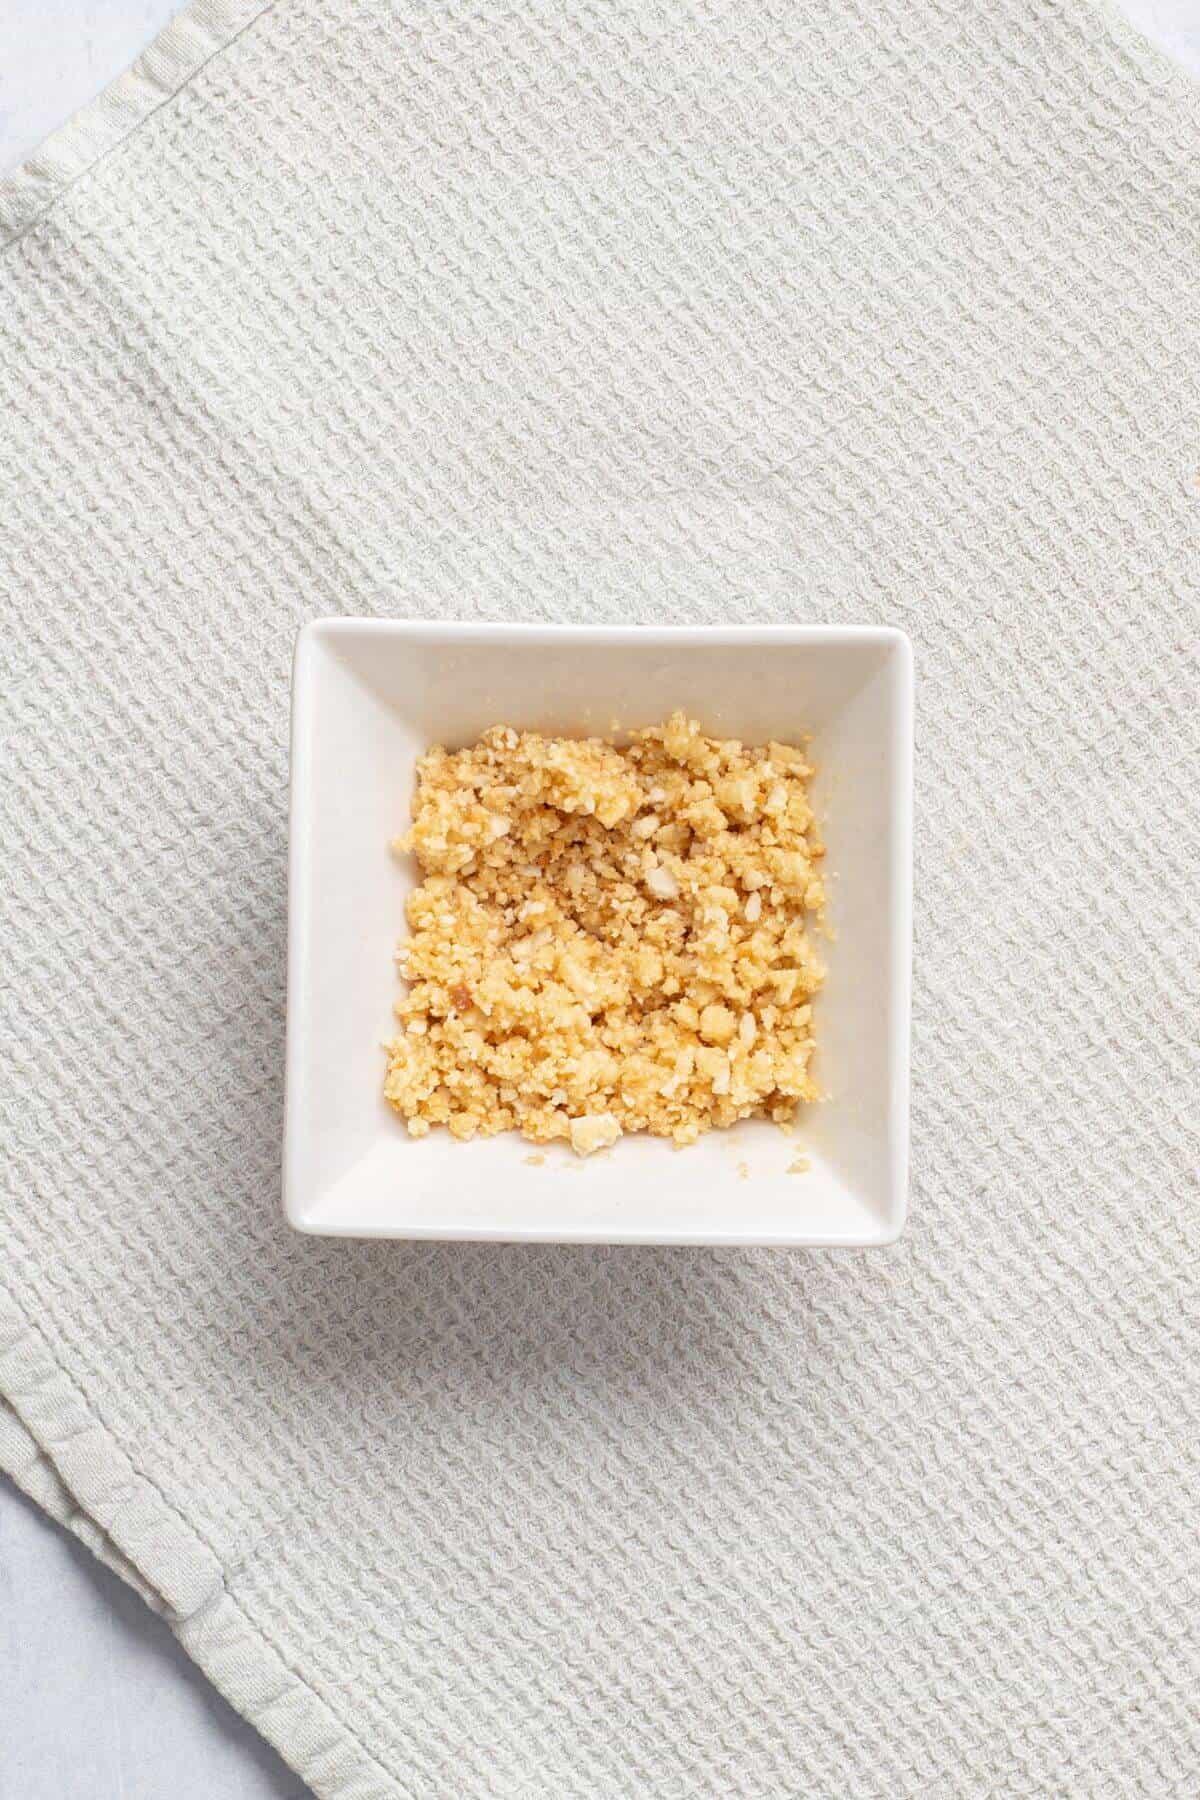
Mix melted butter in a small bowl with the graham cracker crumbs until everything combines well.
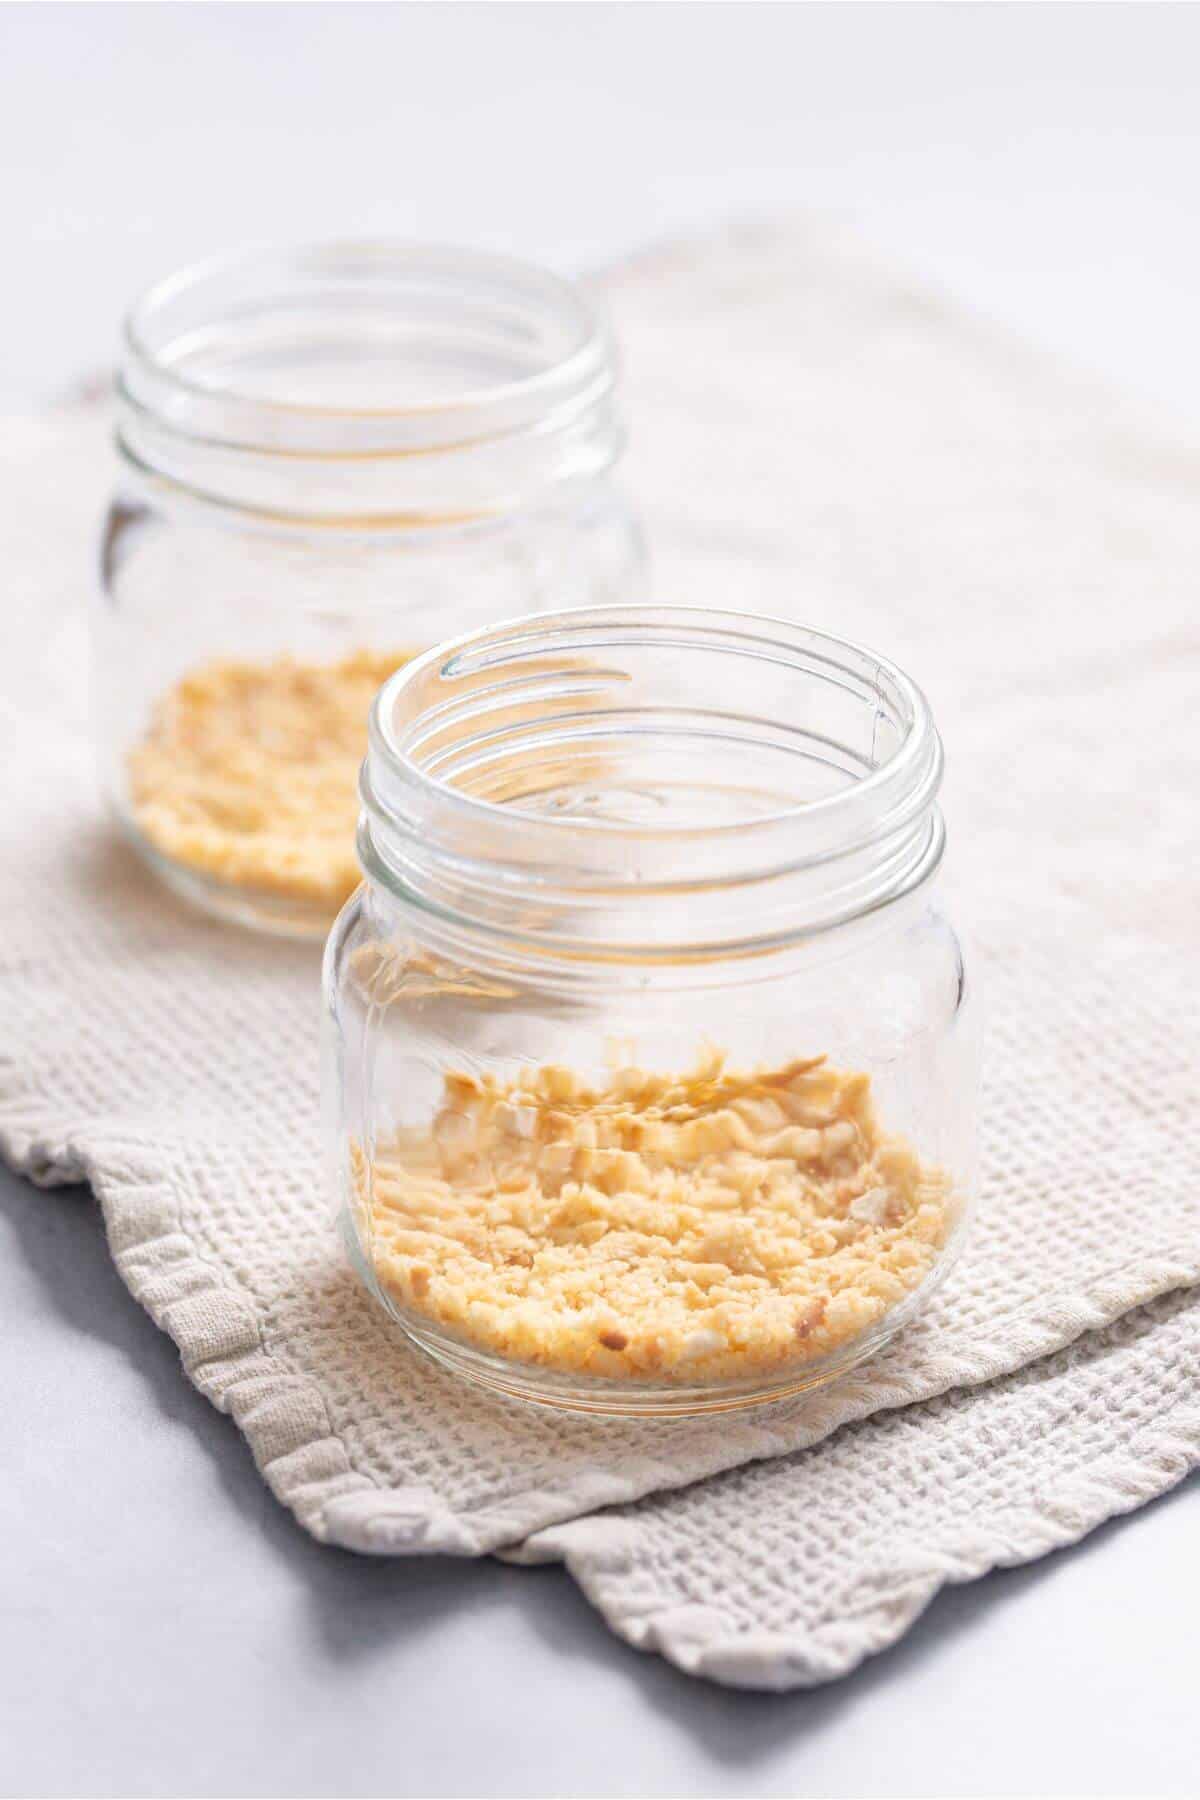
Divide the crumb mixture equally between the jars for the graham cracker crust.
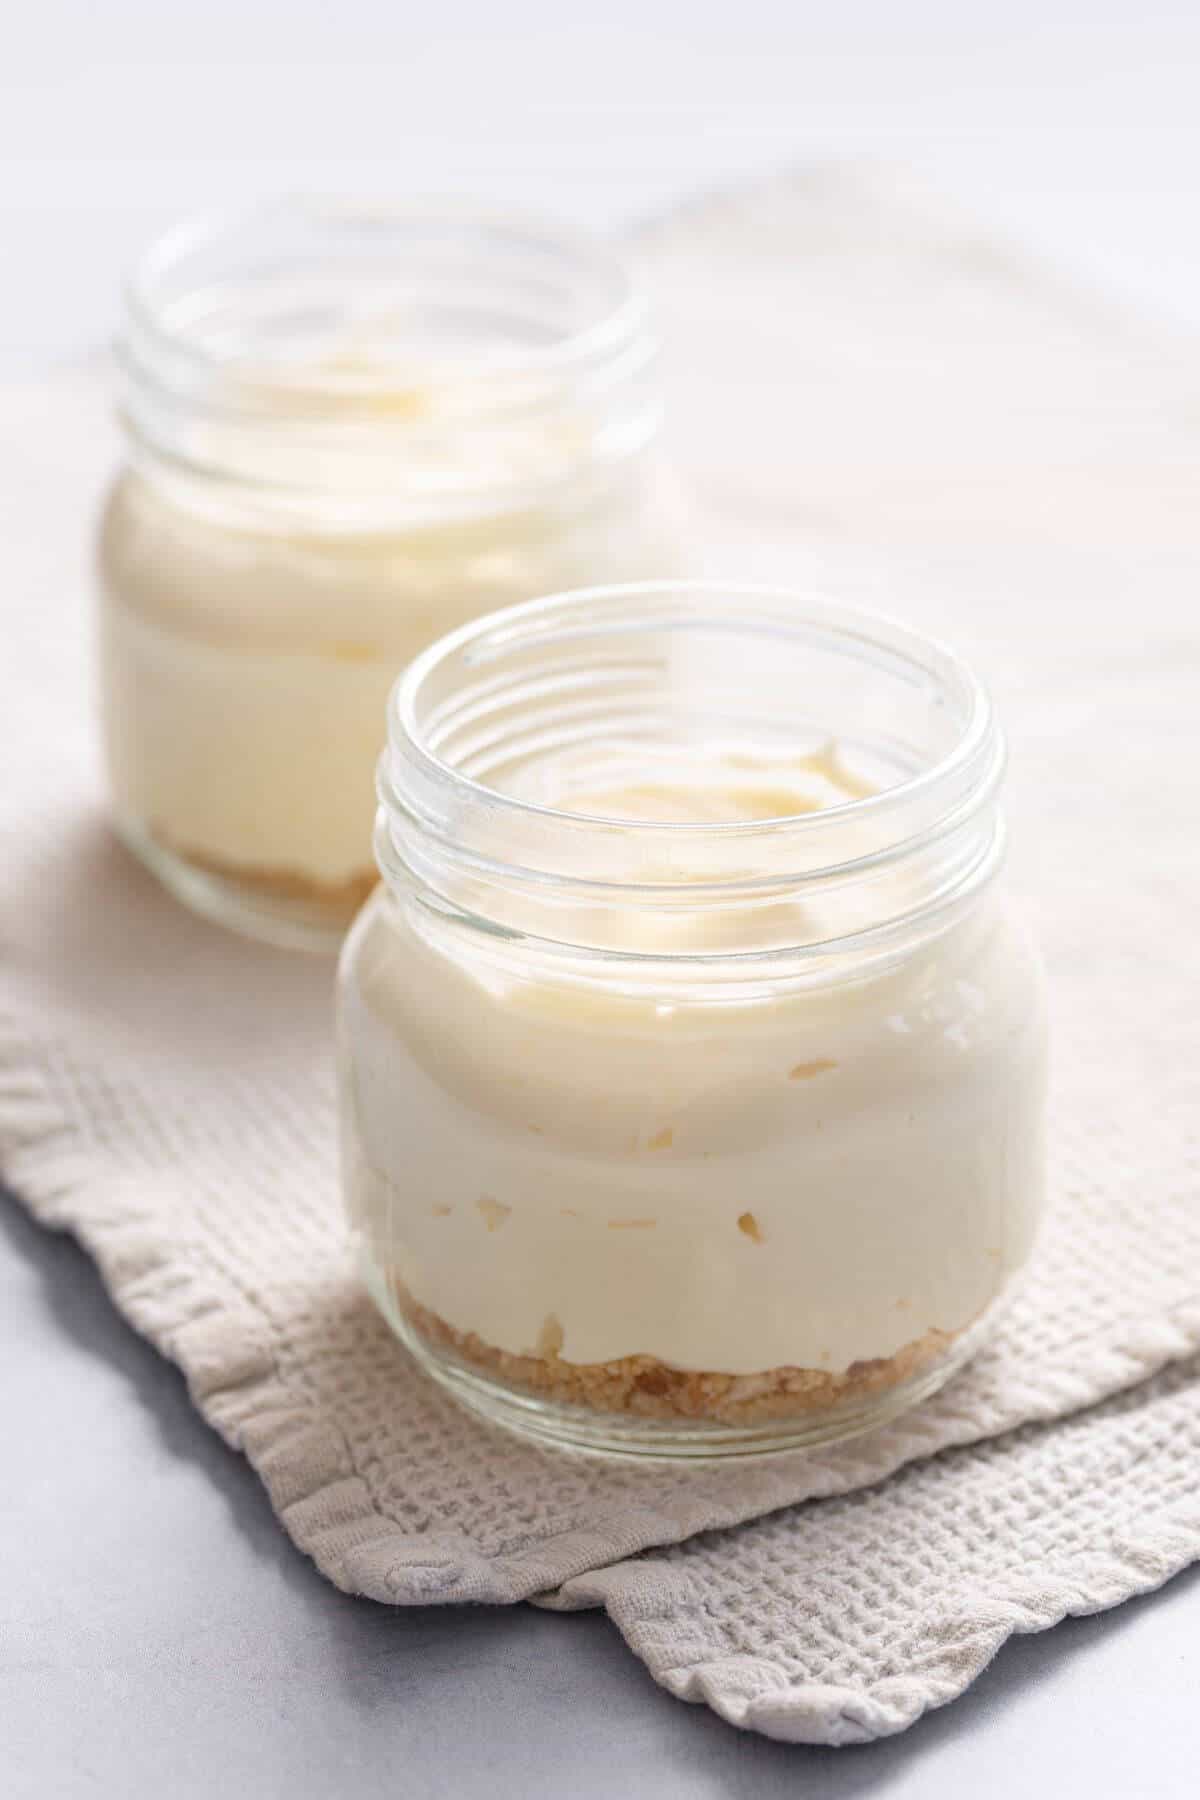
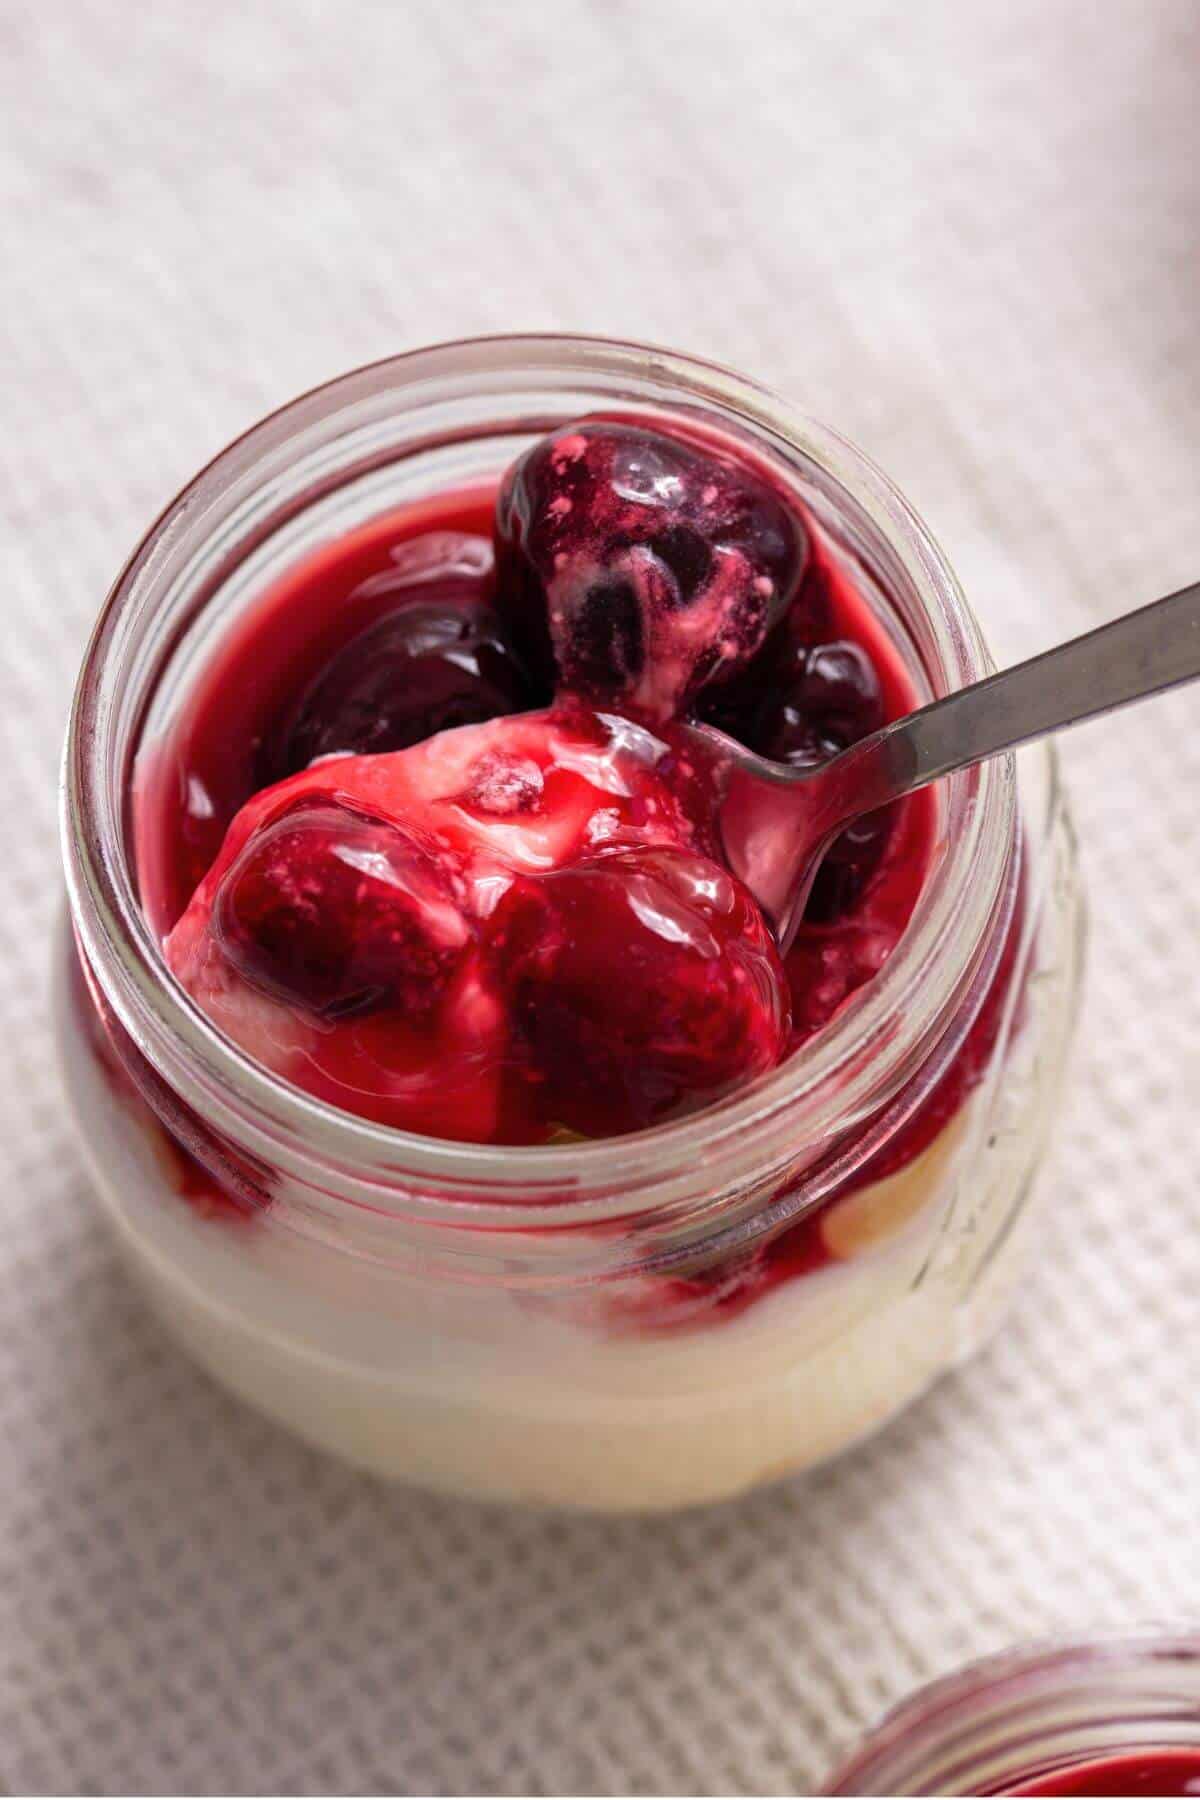
Add the cheesecake filling over the crust.
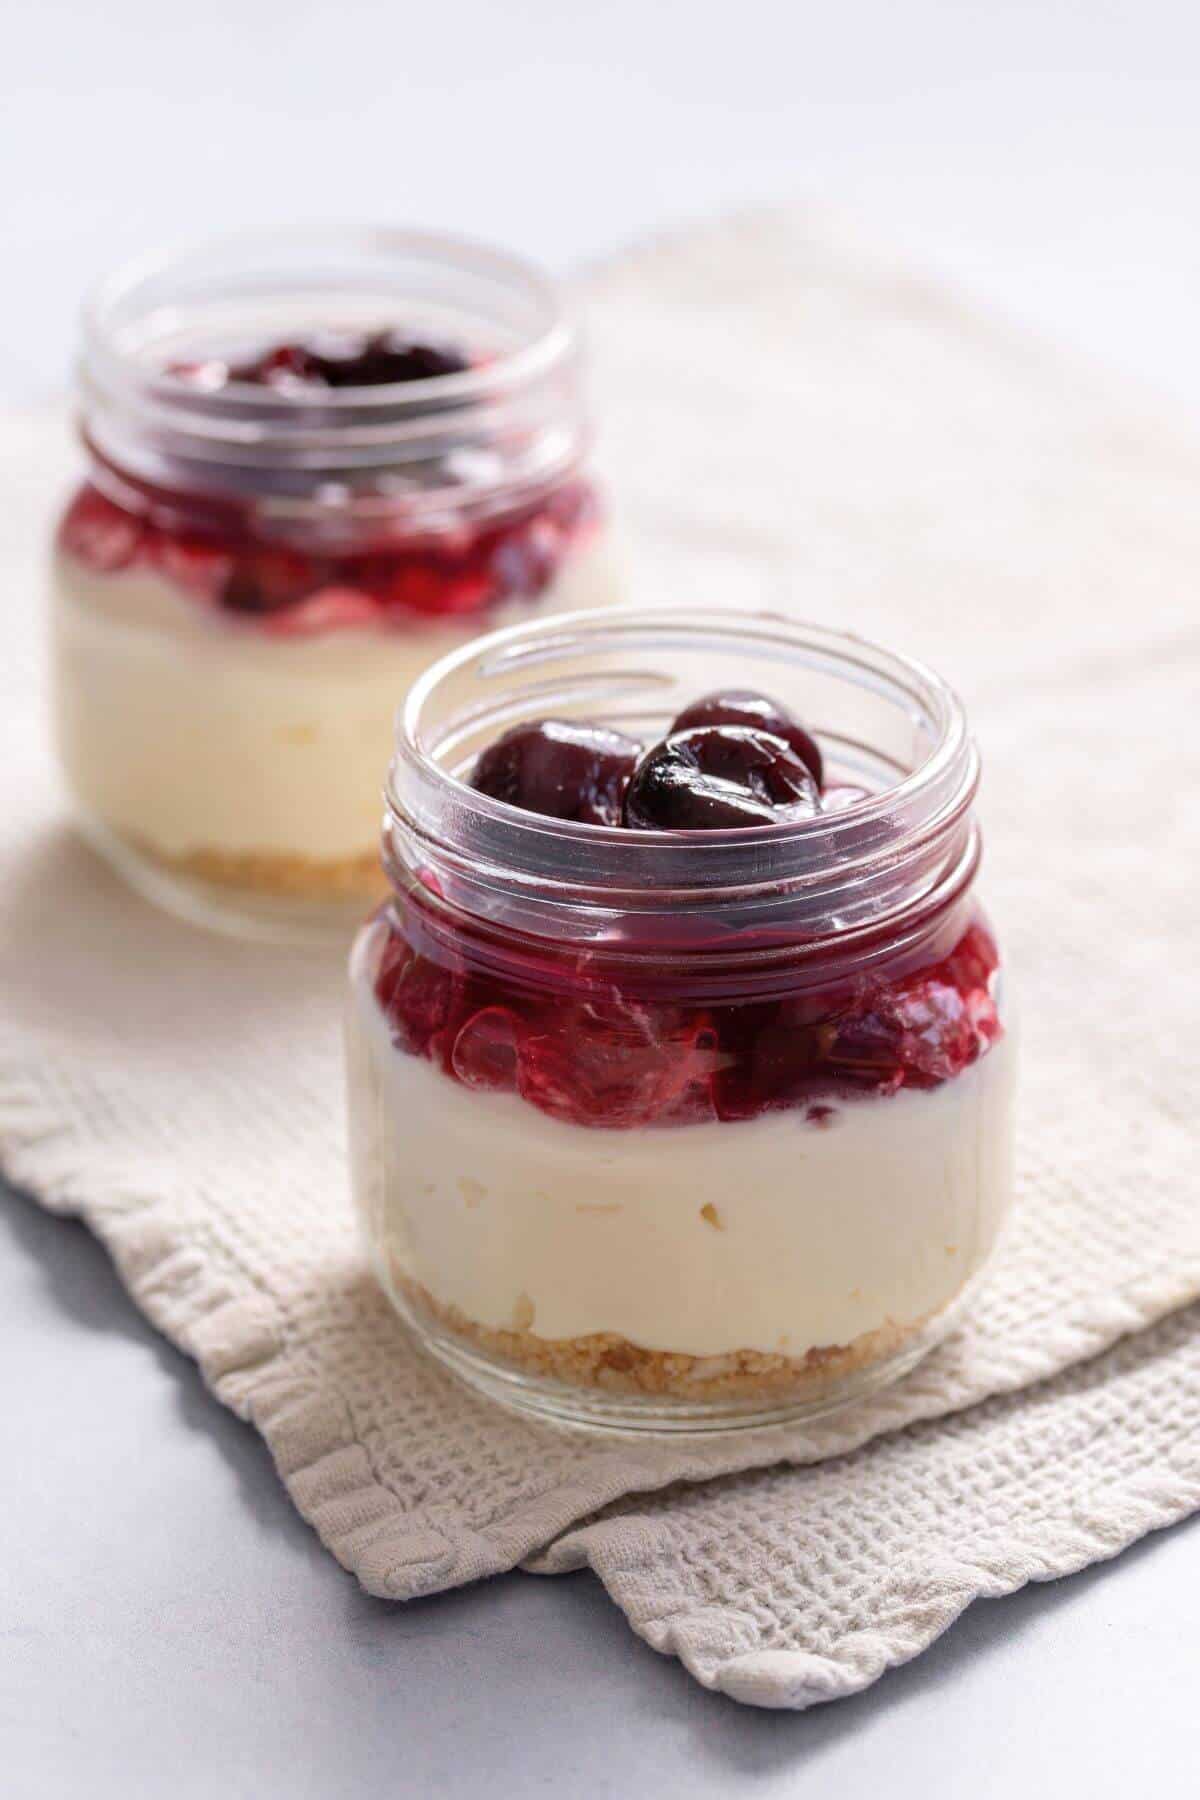
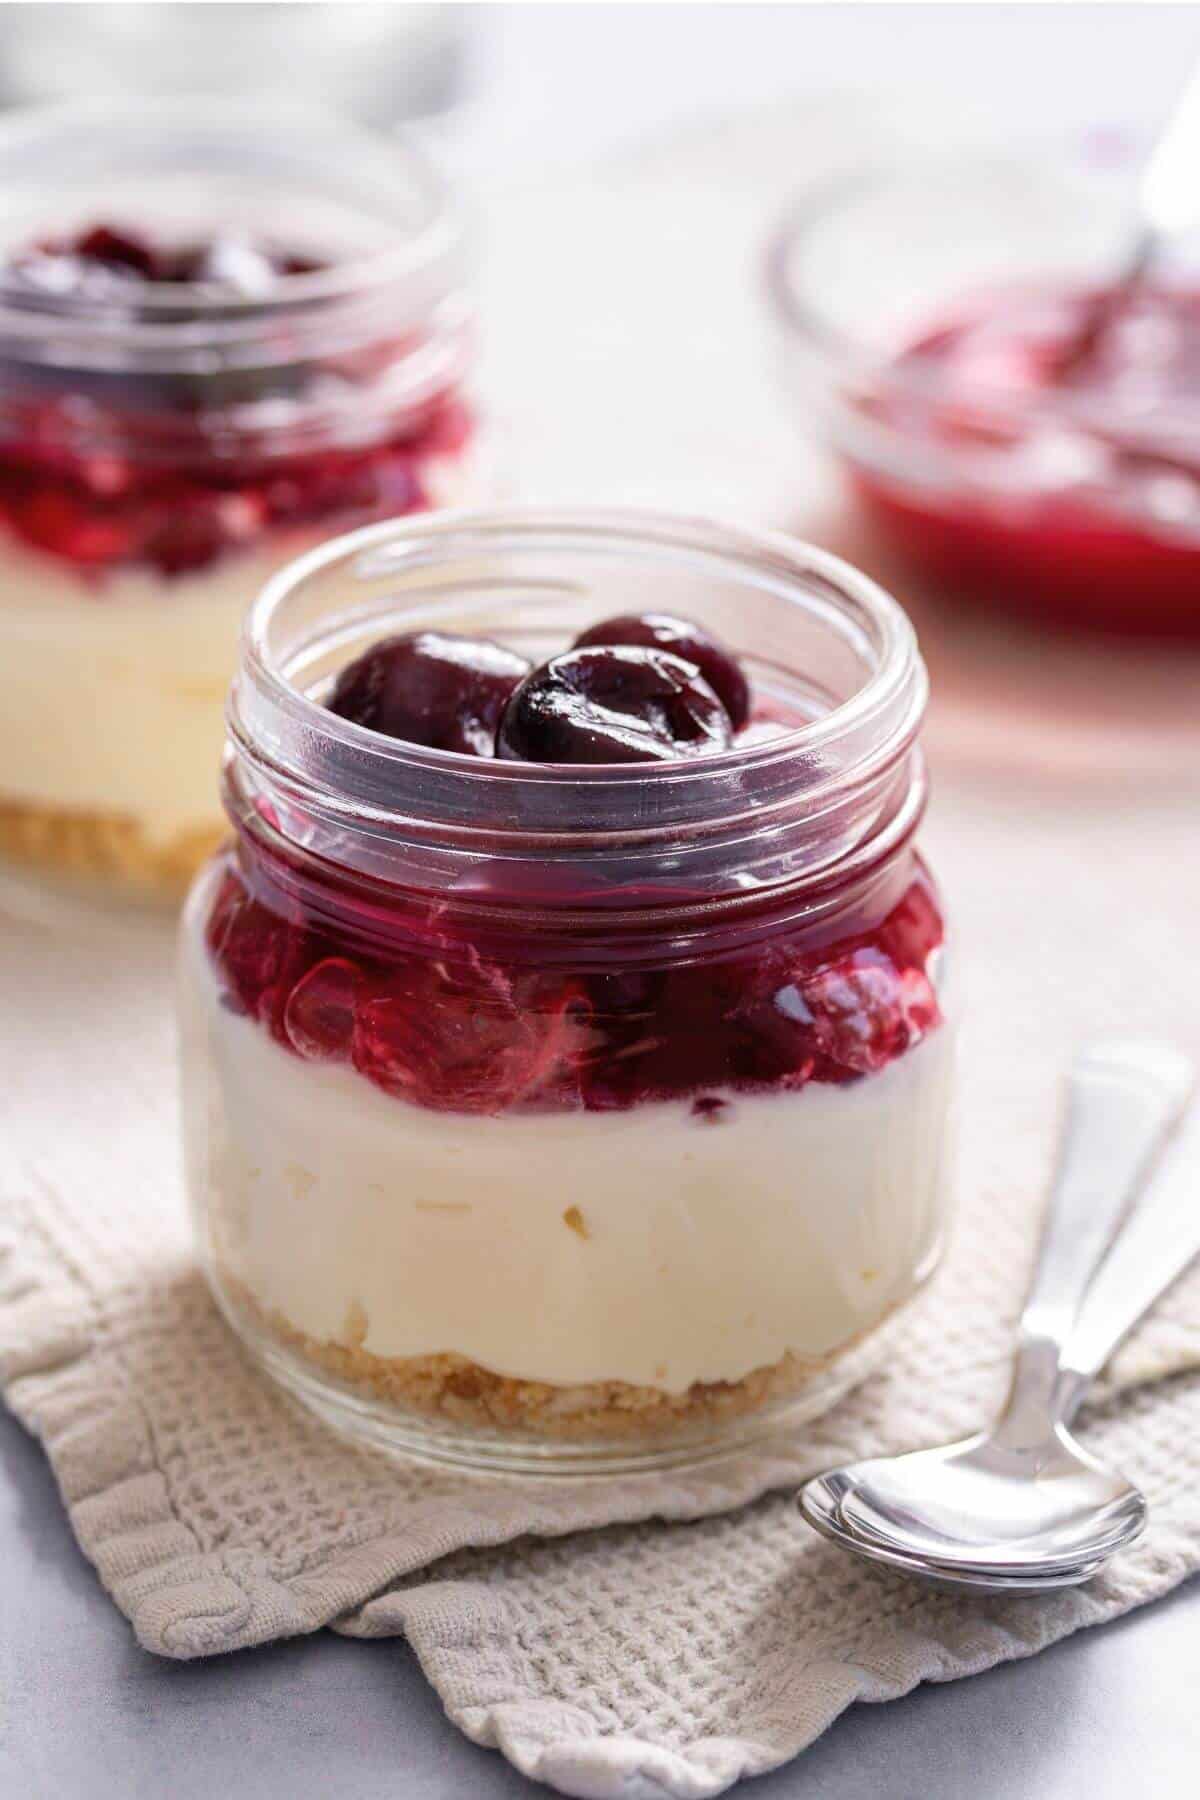
Top with cherry pie filling and finish with tart cherries on top.
Enjoy immediately or refrigerate until ready to eat.
Variations
Making no-bake cheesecake in a jar allows for endless flavor combinations. So many different types of crusts and fillings can be used. You can alls add various toppings like fresh fruit, caramel sauce, or crushed cookies.
Here are a few ideas you can try.
- Oreo: This variation will taste similar to our cookies and cream mousse. Make the crust with crushed Oreo cookies and add extra cookie crumbs to the filling.
- Raspberry: Use a raspberry sauce topping.
- Chocolate: Add cocoa powder to the cheesecake mixture and make the crust with crushed Oreos. Use chocolate shavings or a chocolate sauce drizzle on top.
- Pumpkin spice: Add cinnamon and nutmeg with pumpkin puree to the filling. You can also top it off with caramel sauce or toasted nuts for added texture and crunch.
- Matcha: Mix some matcha green tea powder into the cream cheese filling mixture.
- Peanut butter: Add natural peanut butter to the filling or top the cheesecake with a peanut butter sauce.
- Nutella: Stir the chocolate hazelnut spread into the filling or use it as a topping.
Tips
These tips will ensure a delicious dessert every time.
- Use room temperature ingredients. When the ingredients are at room temperature, they are easier to mix, resulting in a smoother batter. If you forget to remove your ingredients from the refrigerator, place the containers in warm water for 15-20 minutes to bring them to room temperature.
- Layer into small mason jars. The best size to use for individual portions is a smaller 4-ounce jar.
- Use a piping bag to pipe the filling into each jar.
- Chill before serving. The cheesecake tastes best when chilled for at least 2 hours and allows time to set. If you're short on time or can't wait, try placing your jars in the freezer for 30-45 minutes instead.
- Add toppings just before serving. This will prevent any sogginess or deflating.
Serving suggestions
Cherry pie filling is a classic topping but you can leave it off if you prefer. Or, top your cheesecake with fresh berries like strawberries or blueberries, or add some whipped cream for extra flavor and presentation. Crushed cookies, chocolate chips, or graham crackers also make great toppings.
Storage
Seal the lid tightly on each jar and store them in the refrigerator for up to 5 days.
If you plan to store them longer, freeze them instead. When you're ready to eat one, thaw it overnight in the fridge before serving.
Related Recipes
If you love mini dessert recipes, here are a few more to try.
- Easy blueberry cobbler is perfect for two.
- Mini pound cake makes a tasty base for strawberry shortcake.
- Single-serve apple pie is a delicious treat for one.
- Mini lemon loaf is an indulgent treat for two.
- Single-serving peach cobbler won't tempt you to over-indulge.
Questions about this recipe
Ask in a comment or use AI to answer based on this specific recipe:
Follow us on Facebook, Instagram, and Pinterest to see more recipes.
Recipe
Cheesecake in a Jar
Ingredients
- 4 tablespoons canned cherry pie filling see notes for leftovers
- 4 ounces cream cheese at room temperature
- 1 tablespoon lemon juice
- 1 cup heavy whipping cream
- ½ cup powdered sugar
- ½ teaspoon vanilla extract
- 4 graham crackers
- 2 tablespoon butter
- 2 tablespoons Tart cherries for garnish (fresh or frozen also works)
Instructions
- In a mixing bowl, use a hand mixer or stand mixer to whip the heavy whipping cream on high speed until it thickens and becomes fluffy. Once it reaches a stage where it's not yet forming peaks, mix in the vanilla extract and powdered sugar. Begin on low speed until the powdered sugar mixes in, then switch to high speed and continue whipping until the cream forms stiff peaks.
- Take another bowl and mix the cream cheese and lemon juice together in the mixer until it turns soft and creamy. After that, add the whipped cream to the cream cheese mixture and whip them together until evenly combined.
- To prepare the graham cracker crust, place the crackers into a zip bag and crush them with a heavy object until they turn into fine crumbs. Alternatively pulse them on a small food processor.
- Melt the butter in a small bowl and mix it with the graham cracker crumbs until everything combines well.
- To assemble the no-bake cheesecakes, divide the graham cracker crumbs equally between jars. Divide equally, add the cheesecake filling, top it with the cherry pie filling, and finish with tart cherries. Enjoy immediately or refrigerate until ready to eat.
Notes
- Make a mini pie: Use it for a small-batch pie or combine it with another fruit filling to make a mixed fruit pie.
- Use as a topping: Cherry pie filling makes a delicious topping for ice cream, yogurt, or pancakes.
- Make turnovers: Use the cherry filling for homemade turnovers. Roll out some mini pie crust dough, cut it into squares, spoon some filling onto each square, fold it over, and seal the edges with a fork. Then bake in the oven until golden brown.
- Mix into oatmeal: Add a spoonful of cherry filling to your morning oatmeal for a fruity twist.
- Bake into muffins: Use the cherry filling to make delicious cherry muffins. Just mix it into your favorite muffin batter and bake as usual.
- Make a parfait: Layer the cherry filling with yogurt and granola for a tasty and healthy breakfast or snack.
- Freeze for later: If you don't want to use the cherry filling right away, you can freeze it for later use in another recipe.
Carol says
This looks amazing but I plan to use the Philadelphia No Bake Cheesecake filling to speed up the preparation time!
Jessica says
I'm not much of a cook so I was always too intimidated to try traditional cheesecake recipes. I made this cheesecake in a jar and it turned out so good! I topped it with mixed seasonal berries I foraged from a bike trail near my house. Looking forward to making it again.
Jane says
I love this recipe! I've made it a few times now, and my family really loves it. It's so easy to make, the ingredients are easy to find, and it's delicious!
Joshua Weberg says
I'm a huge cheesecake fan and this recipe did not disappoint! Also, make sure to chill the cheesecake as suggested.
Janice says
This no-bake cheesecake in a jar was one of my favorite dessert recipes! I love topping it with blueberries, and the combination was so perfect! I would definitely save this recipe and try out other toppings as well!
Alex says
I made these yesterday for a picnic! Everyone absolutely loved them. And I adore how easy they were! They looked so classy, too. Thanks so much!
Shirley says
Does the 1x use 4 4-ounce mason jars? If you click on 2x or 3X it also reads 4 4-ounce mason jars.
Lisa MarcAurele says
The amount of equipment doesn't change when you change the servings, only the ingredient amounts will change. The 1x should be enough for 4 4-ounce jars.