

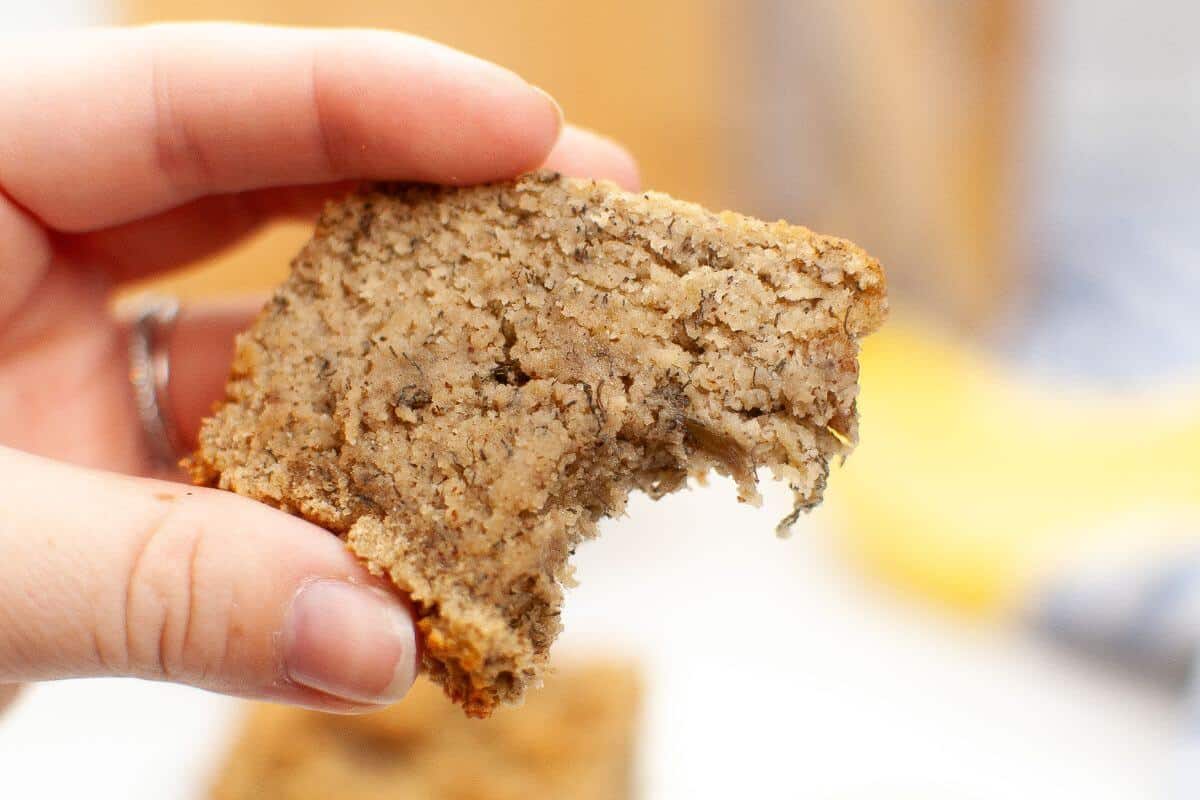
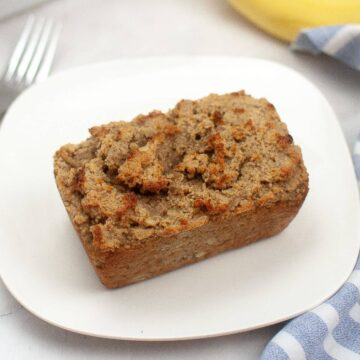
Enjoy moist and fluffy coconut flour banana bread, a perfect gluten-free treat for year-round snacking. Ideal for holidays or cozy mornings, this wholesome recipe is naturally sweet and satisfying.
Want to save this post?
Enter your email below and get it sent straight to your inbox. Plus, I'll send you the latest recipes and tips every week!
Over the years, I've tried countless recipes, but this coconut flour banana bread has earned a permanent spot in my kitchen. It's naturally gluten-free, delightfully moist, and packed with that rich banana flavor. Whether it's for a lazy weekend breakfast or a quick snack on a busy day, this recipe always delivers.
Using coconut flour in this quick bread keeps it gluten-free and adds a subtle nutty flavor and extra fiber. It's what I use in my keto pancakes and low-carb chocolate chip cookies, too. Plus, bananas are nature's sweetener, which means you can skip a lot of the added sugar without sacrificing flavor. It's the perfect way to use up those overripe bananas sitting on your counter.
Banana bread always feels right, but there's something extra cozy about making it during cooler months. The smell of baking fills the house with warmth, and it's a go-to for gatherings. But this bread is so good, you'll want to make it year-round.
Ingredients
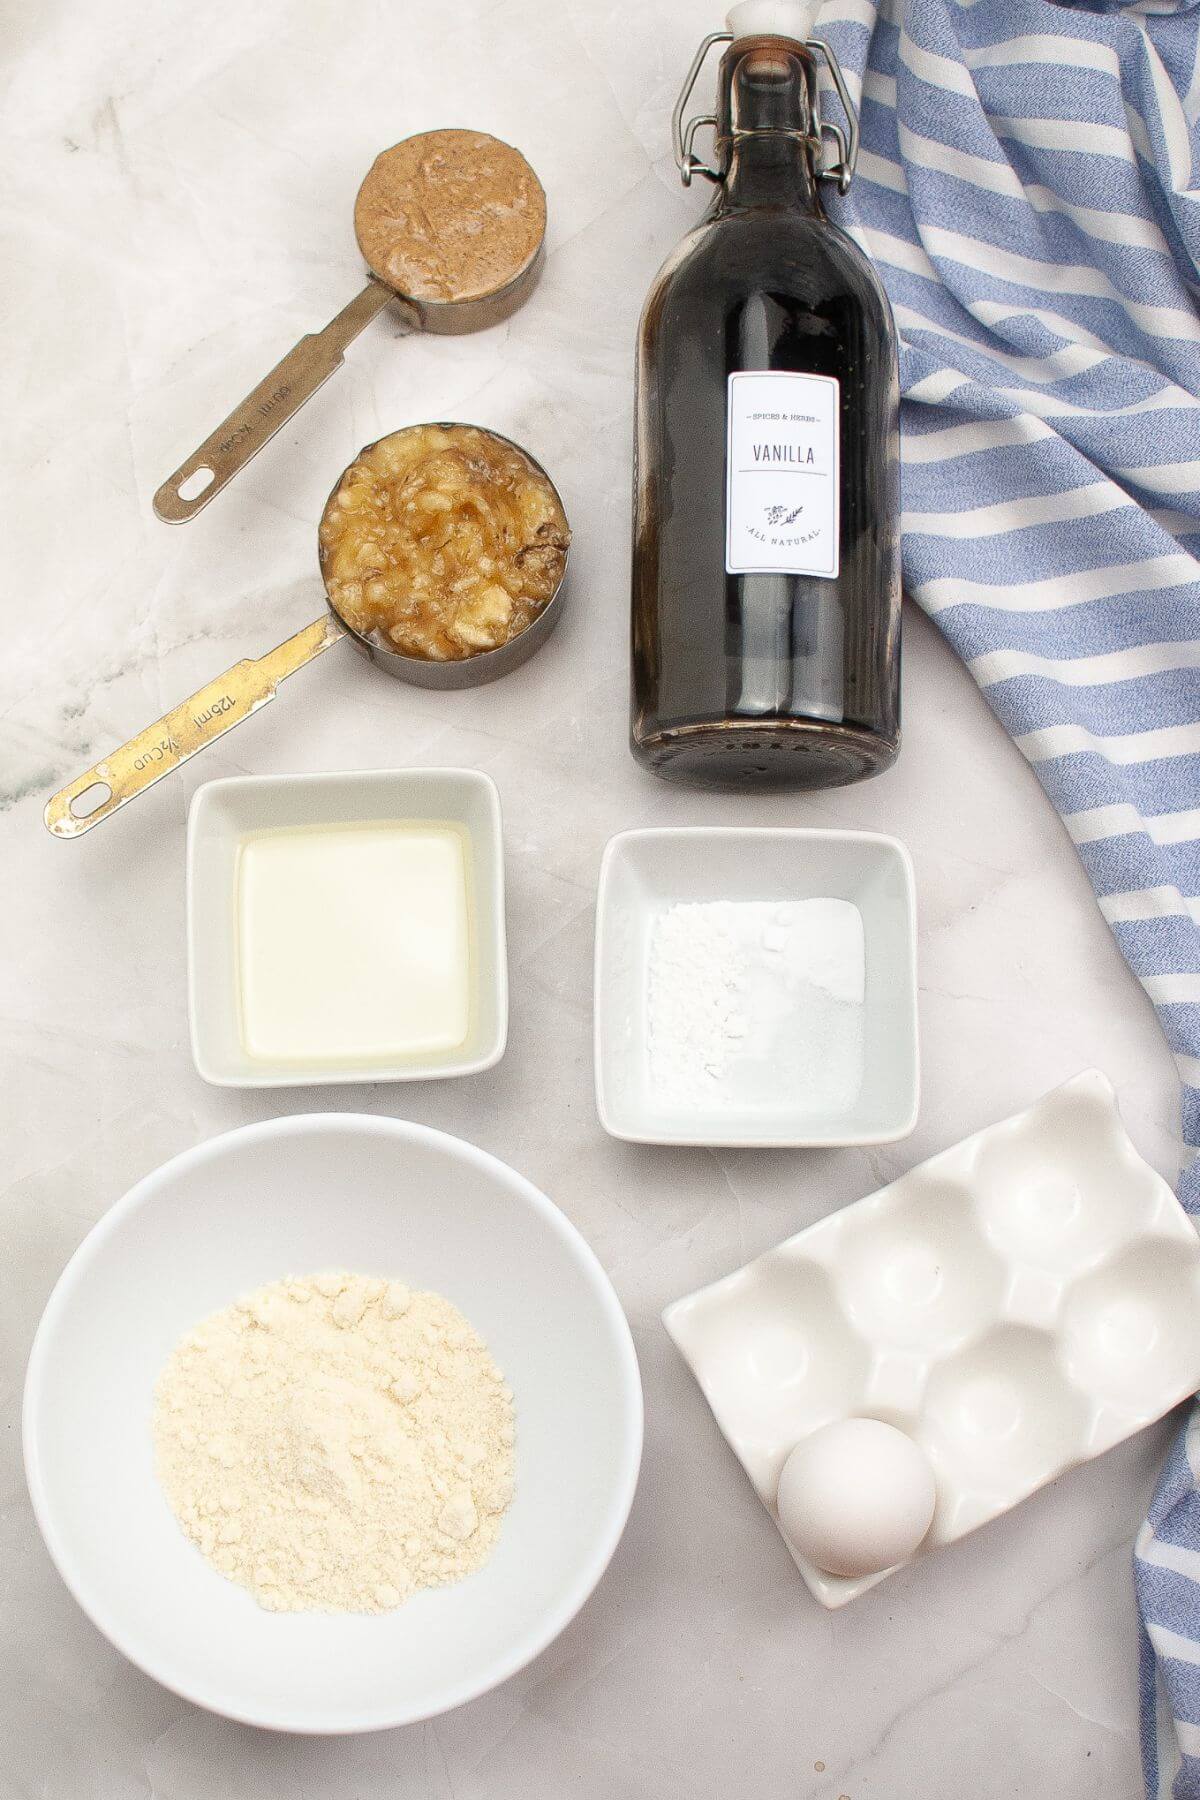
- Mashed Banana: Adds natural sweetness, moisture, and flavor to the bread.
- Egg: Acts as a binder and provides structure, ensuring the bread holds together.
- Almond Butter: Adds richness, healthy fats, and a subtle nutty flavor.
- Coconut Oil: Contributes to the bread's moist texture and enhances the flavor.
- Vanilla Extract: Boosts the overall flavor with a warm, sweet aroma.
- Coconut Flour: Creates a gluten-free base, adds fiber, and gives the bread its structure.
- Baking Powder: Helps the bread rise and achieve a fluffy texture.
- Baking Soda: Works with the acidic components to create lift and tenderness.
- Salt: Enhances all the flavors and balances the sweetness.
Scroll down to the recipe card for quantities used.
Instructions
Once you've gathered your ingredients, you'll want to preheat your oven to 350°F and grease a 5 ½ x 3-inch mini loaf pan. Then follow these simple directions to make the batter and bake the loaf.
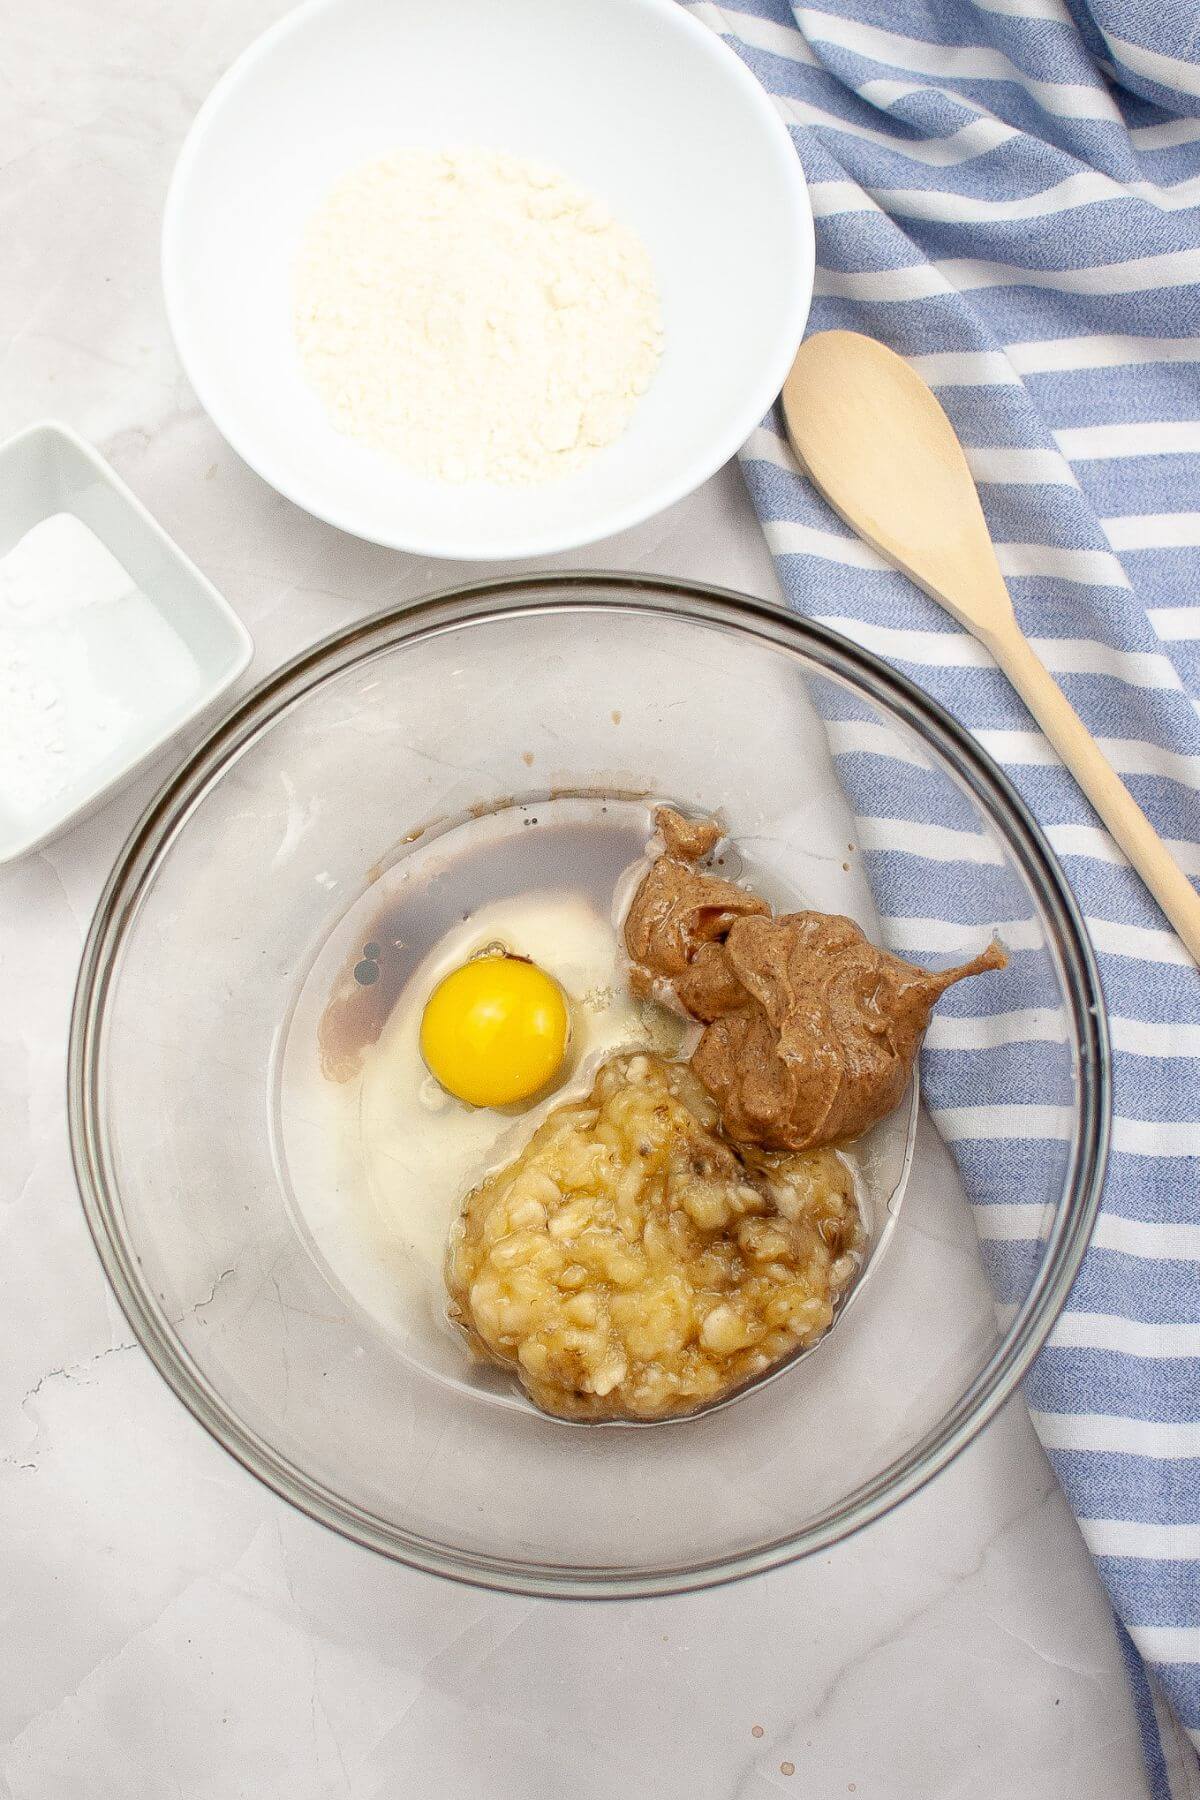
In a medium bowl, combine mashed bananas, eggs, almond butter, coconut oil, and vanilla extract.

Stir in coconut flour, baking powder, baking soda, and salt until batter forms.

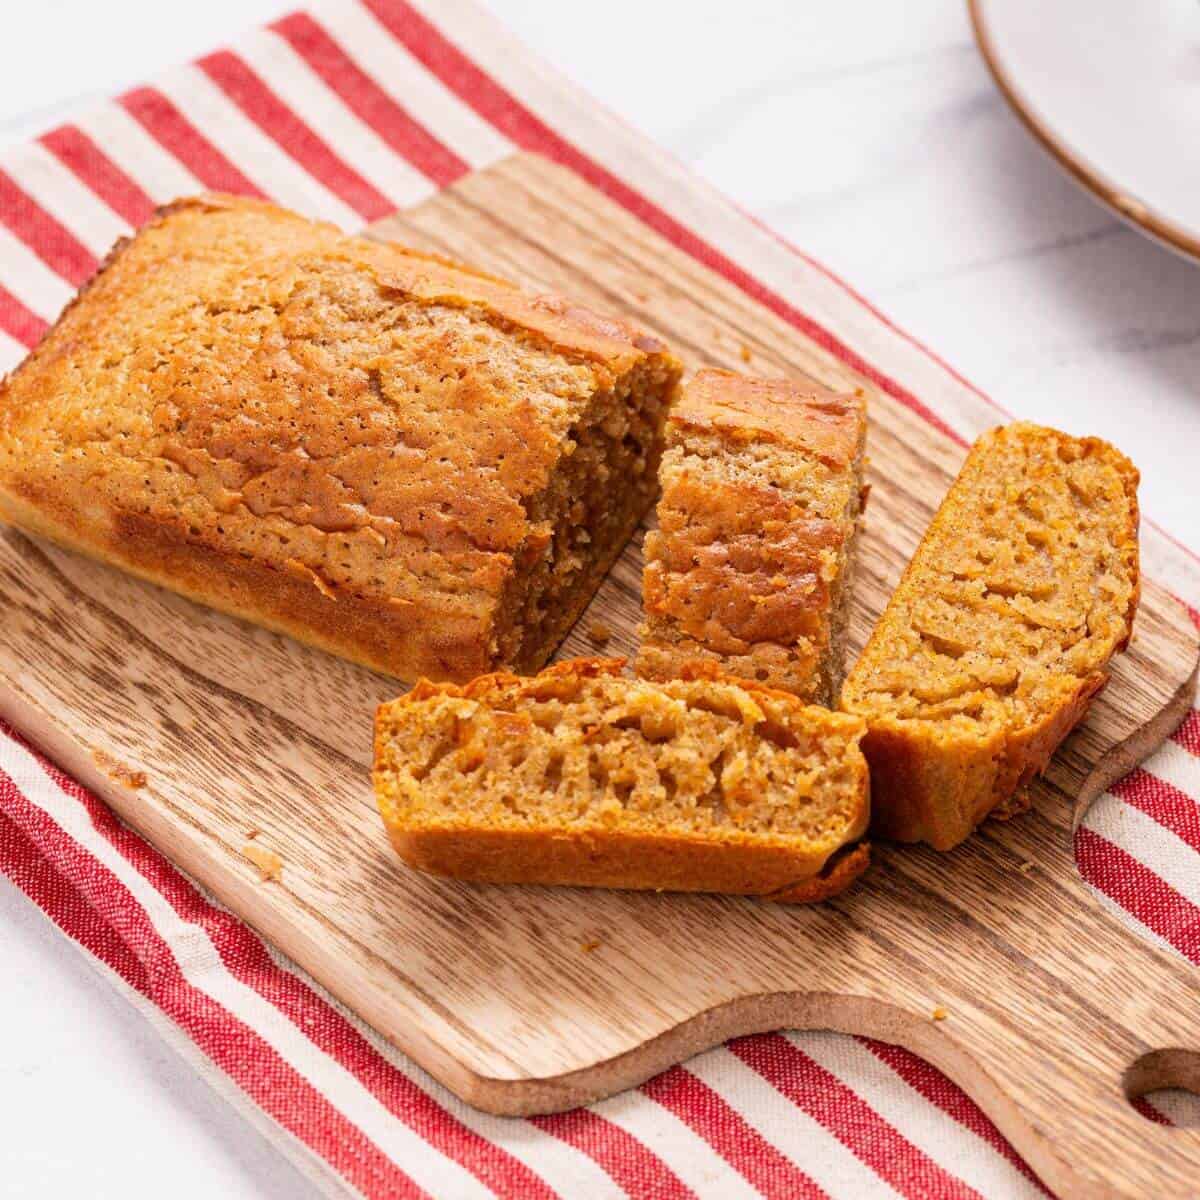
Pour batter into prepared loaf pan. Bake for 25 to 30 minutes or until top is golden and toothpick inserted near center comes out clean.
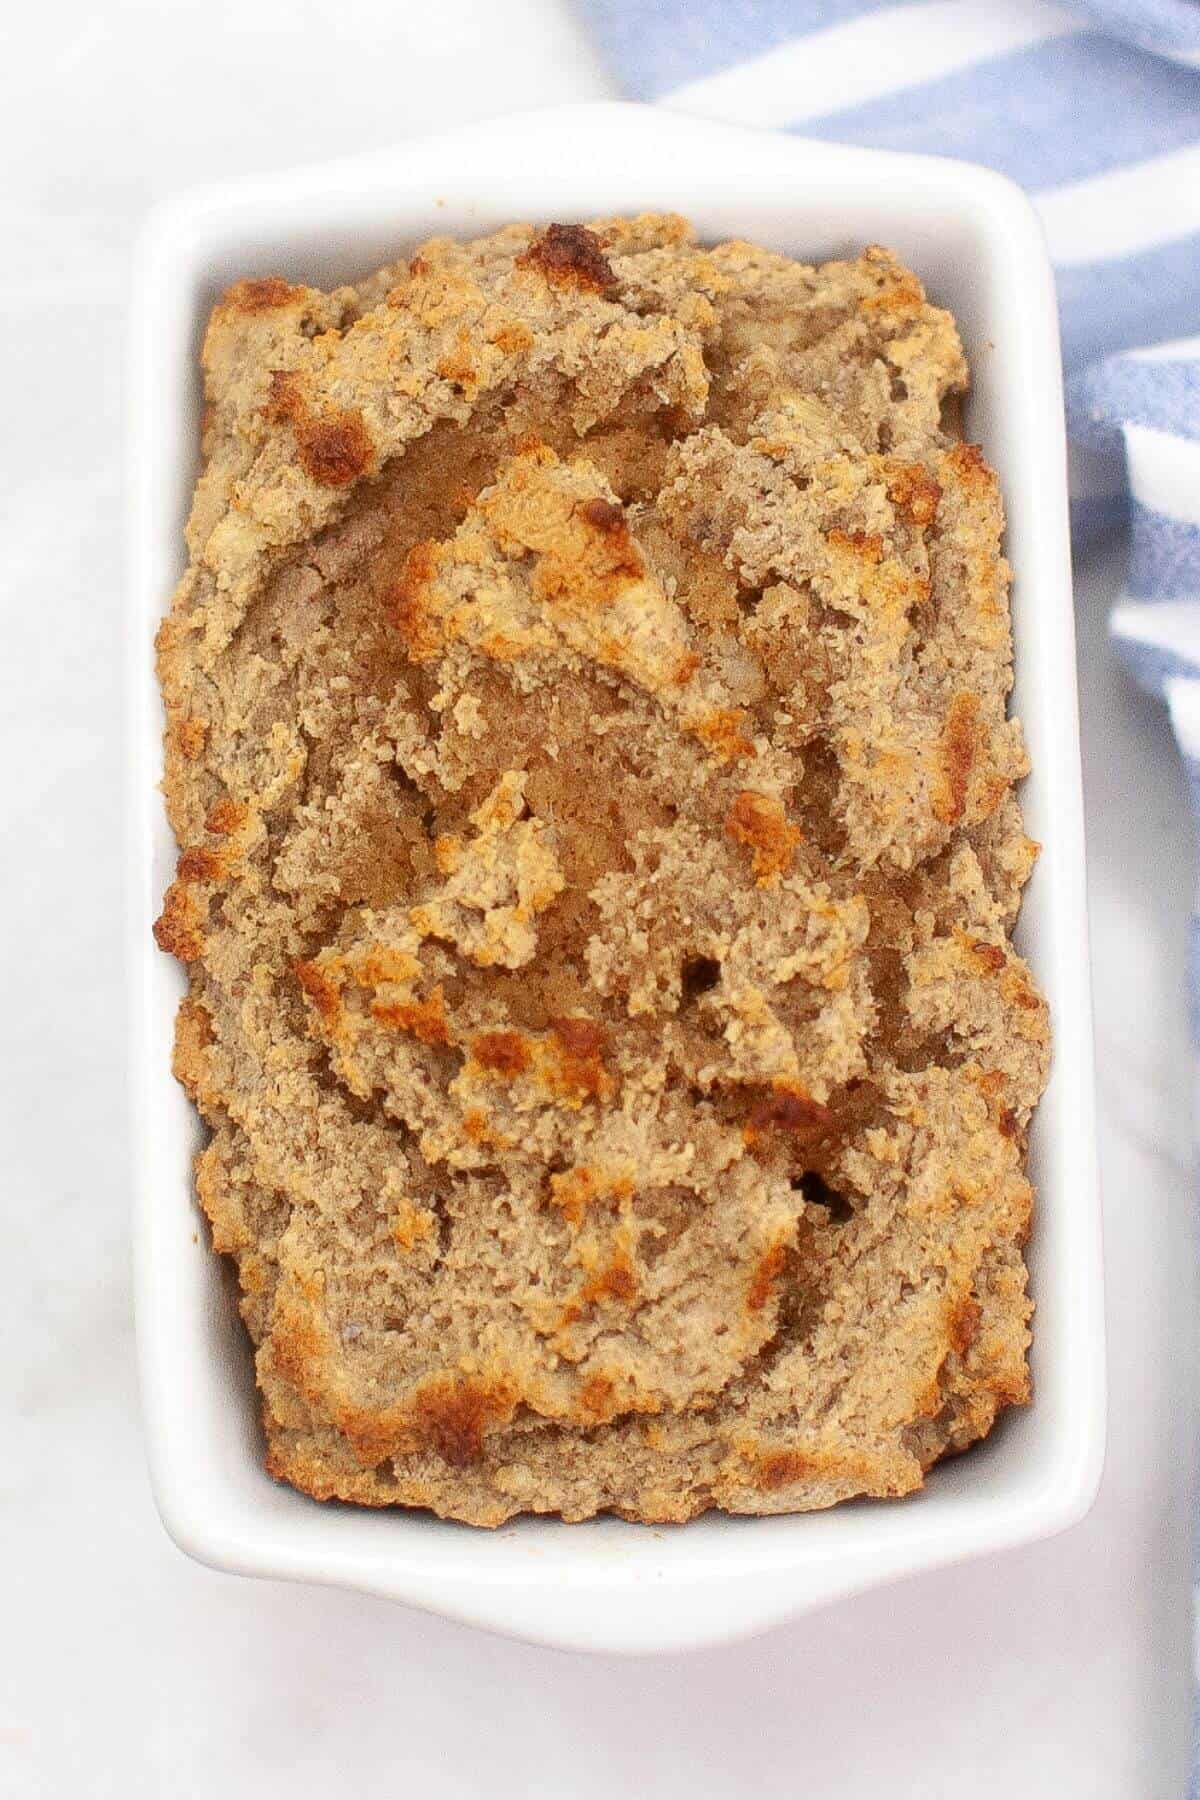
Remove from oven and cool on rack for 15 minutes. Remove from pan and cool completely on rack before slicing.
Hint: Let the batter sit for a few minutes before baking to allow the coconut flour to absorb the moisture fully, ensuring the bread has the perfect texture and isn't too dry.
Variations
Here are some ideas to personalize this banana bread coconut flour recipe:
- Tropical Twist: Add shredded coconut and a handful of chopped pineapple to give the bread a tropical flair. It's perfect for a summer gathering or Hawaiian-themed meal.
- Spicy Comfort: For guests who enjoy bold flavors, incorporate ground ginger, cinnamon, and cloves to give the bread a warm, spiced kick. A spicy option is ideal for fall or winter.
- Nutty and Sweet: If you love Mediterranean flavors, add chopped pistachios, almonds, or walnuts along with a drizzle of honey to enhance both the texture and taste.
- Mexican-Inspired: A pinch of cinnamon, cocoa powder, and a touch of chili powder can infuse your banana bread with the vibrant, bold flavors of Mexican cuisine.
- Vegan Option: Swap the egg for a flaxseed or chia egg and use a plant-based sweetener like maple syrup to make the recipe vegan-friendly without compromising flavor.

Tips
Top tip: Make sure your bananas are extra ripe for the best flavor and sweetness. The riper they are, the more natural sugar they'll provide, resulting in a moist and delicious bread.
Here are some more helpful tips for making this recipe:
- Measure coconut flour properly. Coconut flour absorbs a lot of liquid, so it's important to measure it correctly by spooning it into your measuring cup and leveling it off.
- Mix gently: Be careful not to over mix the batter. Stir until the ingredients are combined to avoid a dense texture.
- Let it cool. Allow the bread to cool completely before slicing to ensure it sets properly and holds its shape.
- Check for doneness: Since oven temperatures can vary, check the bread with a toothpick. If it comes out clean, the bread is ready!
- Storage: Store leftovers in an airtight container at room temperature for a few days or freeze slices for longer-lasting freshness.

Serving suggestions
When it comes to serving this banana bread with coconut flour, the possibilities are endless. A simple and classic option is to enjoy it as-is, with a warm cup of coffee or tea for a cozy breakfast or snack. If you prefer a bit of extra richness, spread a layer of butter on top.
For those who follow a specific diet, this gluten-free bread can easily be tailored to fit a variety of dietary needs. If you're looking to make it lower-carb, you can replace some of the banana with a bit of pumpkin puree to reduce sugar content while still maintaining moisture. This recipe is also naturally dairy-free, but if you're looking for a creamier option, you could serve it with coconut whipped cream or a little vegan butter.
If you're looking to level up this banana bread for a special occasion, consider serving it with fresh fruit like berries or a side of yogurt. For a dessert-style treat, top slices with a scoop of vanilla ice cream or a drizzle of dark chocolate for extra decadence. You could also pair it with other coconut flour baked goods like keto brownies.
Storage
To store the banana bread, simply let it cool completely and then wrap it tightly in plastic wrap or place it in an airtight container. It can be kept at room temperature for up to 3 days, or you can store it in the refrigerator for up to a week to keep it fresh longer.
If you want to keep it for an extended period, freeze individual slices or the entire loaf. Just wrap it in plastic wrap and then aluminum foil before freezing, and it will last for up to 3 months.
When you're ready to enjoy the bread again, simply let it thaw at room temperature for a few hours or heat it in the microwave for about 20 to 30 seconds. If you prefer a warm, slightly crispy texture, you can reheat it in the oven at 350°F for 5 to 10 minutes or grill it in an oiled skillet.
FAQs
While coconut flour is key for the texture and flavor in this recipe, it's not easily swapped with regular flour since it absorbs more liquid. If you want to use a different flour, almond flour could be a good alternative, but you'll need to adjust the liquid and egg quantities.
Yes! You can replace the egg with a flax or chia egg (1 tablespoon flax or chia seeds mixed with 2.5 tablespoons water). Also, use a plant-based sweetener like maple syrup or stevia to keep it vegan-friendly.
Coconut flour tends to absorb a lot of moisture, so if your banana bread is dry, it could be due to over-measuring the flour or not using enough wet ingredients. Make sure to measure coconut flour properly and ensure your bananas are very ripe and mashed well. Adding a bit more coconut oil or almond butter can also help keep the bread moist.
Questions about this recipe
Ask in a comment or use AI to answer based on this specific recipe:
Follow us on Facebook, Instagram, and Pinterest to see more recipes.
Recipe
Coconut Flour Banana Bread
Ingredients
- ½ cup mashed banana about 1 banana
- 1 egg
- ¼ cup almond butter
- 2 tablespoons coconut oil melted
- ½ teaspoon vanilla extract
- ¼ cup coconut flour
- ¼ teaspoon baking powder
- ¼ teaspoon baking soda
- ⅛ teaspoon salt
Instructions
- Preheat oven to 350°F. Grease 5 ½ x 3-inch mini loaf.
- In a medium bowl, combine mashed bananas, eggs, almond butter, coconut oil, and vanilla extract.
- Stir in coconut flour, baking powder, baking soda, and salt until batter forms.
- Pour batter into prepared loaf pan. Bake for 25-30 minutes or until top is golden and toothpick inserted near center comes out clean.
- Remove from oven and cool on rack for 15 minutes. Remove from pan and cool completely on rack before slicing.


Comments
No Comments